Introduction
You are encouraged to install programming tools on your personal computer, so that you do not need to come to the CS department labs just to work on coursework. All the tools mentioned below are absolutely free to use.
You are encouraged to back-up your files while you work, and strategies are outlined below.
If you have trouble with any instructions, you may bring your computer to office hours, workshop or lab and ask for help.
Note: Your programs will be graded based on their behavior running on our lab computers. Test your code in the lab before submitting it.
Backup your files
The CS department computers delete all files saved to them when you log off. Do not use the department lab workstations as a place to store for your files. Instead, there are many tools available to you to backup your files.
- You can always e-mail files to yourself. You have an e-mail account from SSU.
- Google Drive
- You can upload files periodically. You have a Google Drive account through SSU.
- Thumbdrive
- You can bring a thumbdrive to class and use this to store your work.
- Use blue as a remote drive
- You can copy files to blue using a program like FileZilla. See instructions below.
- Use blue as a local drive
- You can mount the blue server so it appears like a local hard drive, and drag-and-drop files into it like you might a thumbdrive. See instructions below.
Caution: if you keep copies of your project files on multiple computers, you must be very careful not to forget which copy is newer and accidentally destroy your most recent work. You should keep a sensible naming convention using version numbers or dates, so that you do not accidentally over-write your newer files with your older files!
Install Python 3
If you want to use your personal computer for development, you will need to install Python 3. You should get Python 3.5.2 from the official website. The specific file to download depends on your operating system.
Install PyCharm
Once you have installed Python, you should download the community edition of PyCharm. This program allows you to edit and execute Python programs. Be sure that you can open and run it.
Mac OS X
Click the Apple menu at the top-left corner of your screen then click About this Mac. The version of your OS will be displayed in a window that gets popped up.
Section 0.4 of the Dive Into Python textbook walks you through the installation.
Windows
Follow these directions from Microsoft to figure out if you have a 32-bit or 64-bit version of Windows. If you have a 64-bit version, you can download and run the Windows x86-64 MSI installer from the Download section. If you have a 32-bit version, or you are still not sure, use the Windows x86 MSI installer.
Section 0.3 of the Dive Into Python textbook walks you through the installation.
Install the Graphics Package
In many of our labs, you will need a special graphics package. Click here to download the graphics package.
You need to download it and make sure it is named "graphics.py" before you use it, and place it in the same folder as the project that is using it. See the below animation demonstrating this.
Use the Graphics Package
In labs, you will learn how to use the graphics package in a just-in-time manner. That is, you do not need to study it in advance, since we will learn as we go. However, as a result, what you have learned about the graphics package will be scattered across a dozen or so labs. This may not be convenient for you.
We have written a short graphics tutorial that you can review whenever you think "Gee, we've done this before, but I forget how to do it...". Then, it is probably in the tutorial.
Login to blue, the CS Department server
The CS department has a Unix server you can use, called blue. You will need to create an account with our system adminstrator. Contact your instructor for help to do this. Once you have a username and password, you can do the steps below.
Mac OS X
- Open Terminal (which comes with your computer).
- In the Terminal window, type the following command, with your actual CS department username filled in as indicated:
ssh yourusername@blue.cs.sonoma.edu
- The first time you run this command, you may see the following warning:
The authenticity of host 'blue.cs.sonoma.edu (130.157.166.29)' can't be established.
RSA key fingerprint is 3d:88:46:69:53:27:d6:9d:7c:ba:b7:f5:bd:1b:88:2a.
Are you sure you want to continue connecting (yes/no)?
Type yes to continue. When prompted, enter your blue password.
Note: you will not see anything on the screen as you type your password, not even ***** or other characters representing your password.
- On your first login, you will be immediately prompted to change your password.
Windows
- You will need to download a program called PuTTY. Download PuTTY from this page by following the first link to PuTTY.exe.
- Use blue.cs.sonoma.edu as the host name and 22 as the port.
- Use your blue User ID and password to log in.
- On your first login, you will be immediately prompted to change your password.
Use blue as a remote drive
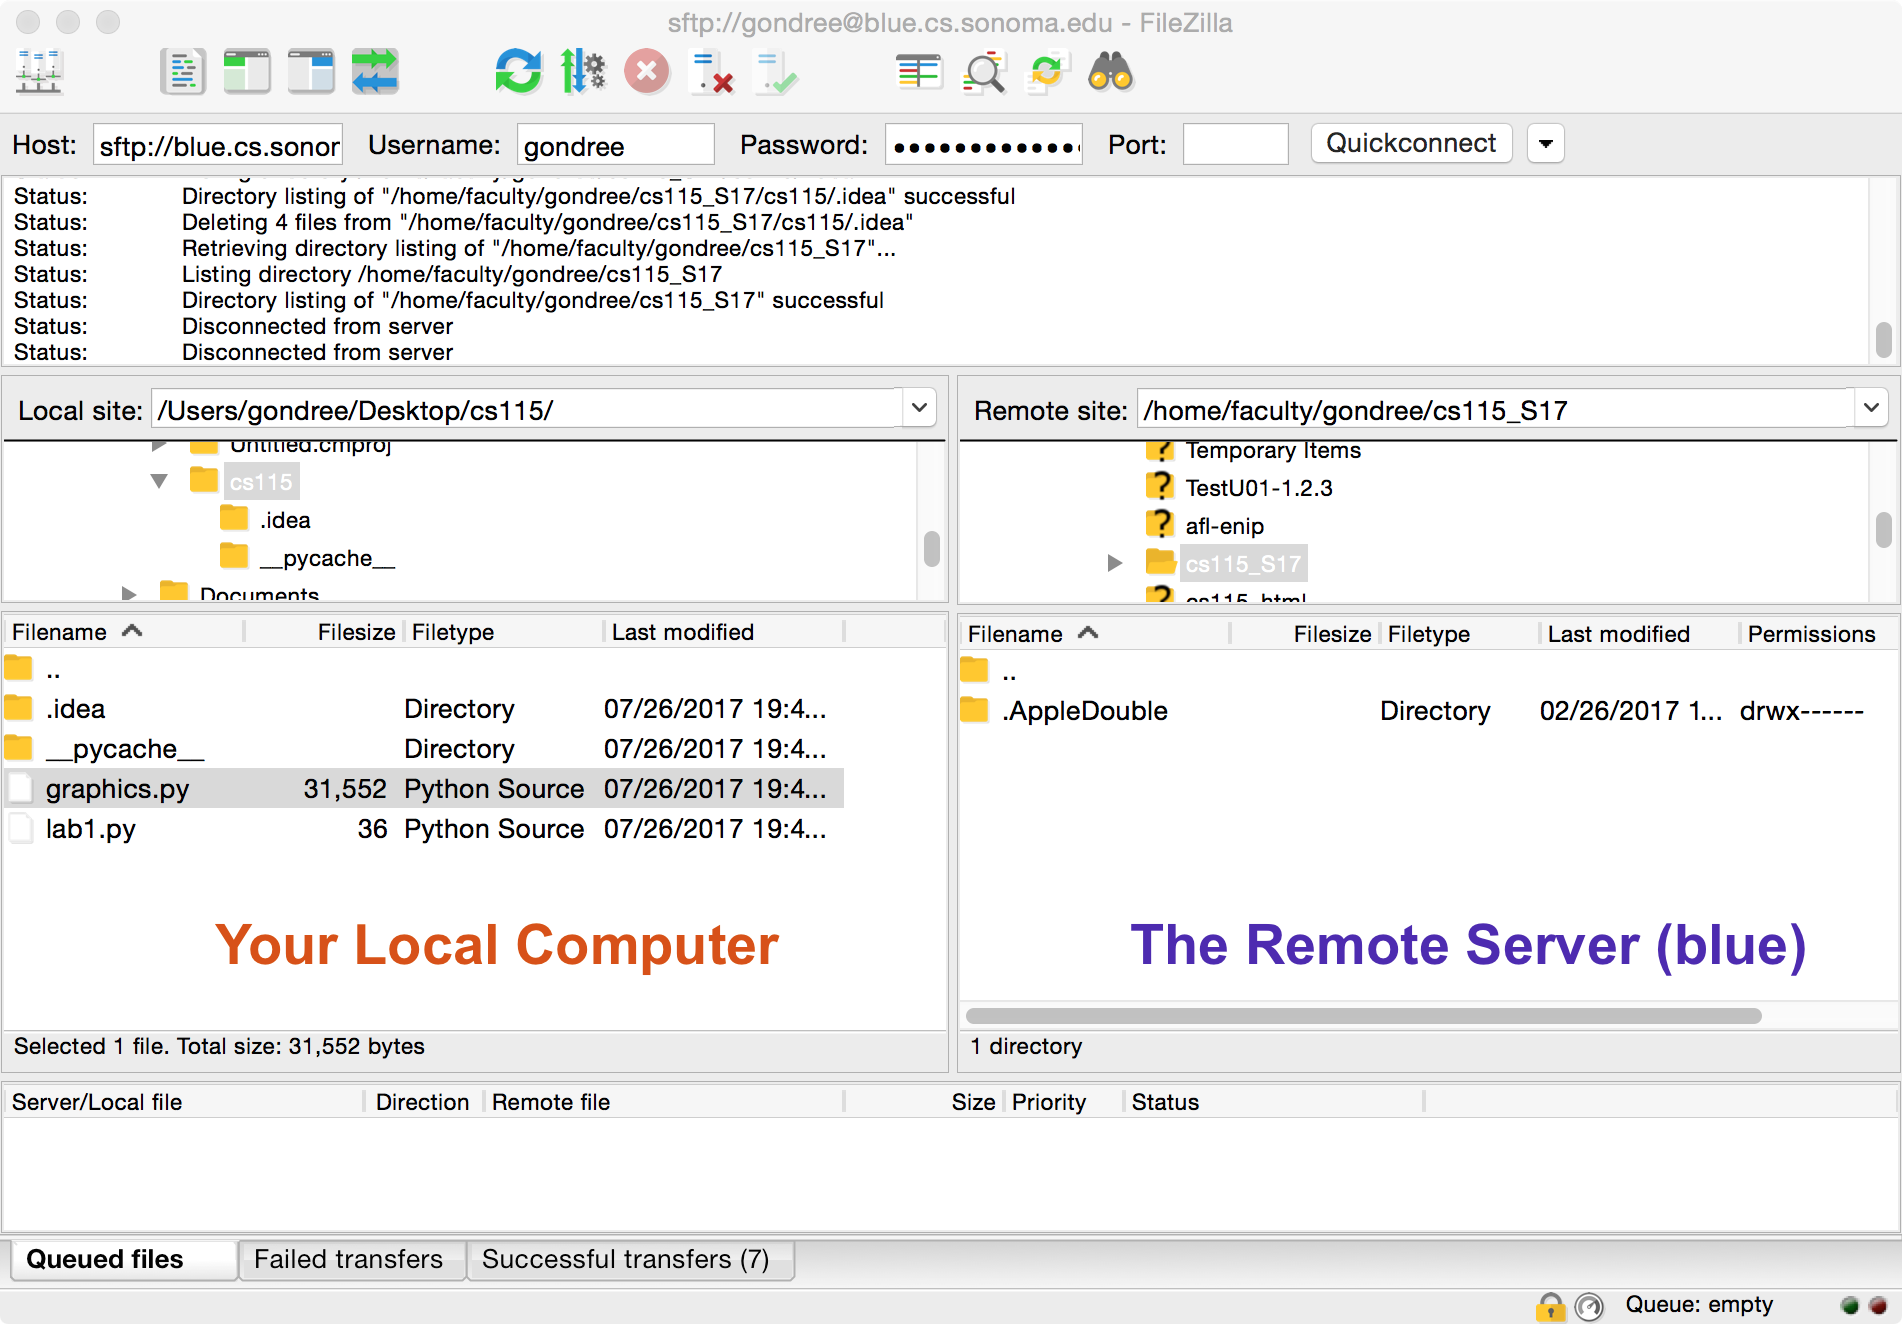
Your best bet is to install a graphical FTP client such as FileZilla Client, which works for Windows, Mac, and UNIX/Linux.
- Follow the link to download FileZilla Client and install the version that is appropriate for your operating system.
- To configure FileZilla (or any FTP client):
- Host: blue.cs.sonoma.edu
- Protocol / Servertype: SFTP or "FTP over SSH"
- Port: 22
- Username: your blue username
- You can now drag and drop your files between your computer (shown on the left) and blue (shown on the right).
Use blue as a local drive on Mac OS X
Follow these steps to mount your blue home-directory so it appears like a thumb-drive connected to the local machine.
Mount blue
From the Finder's Go menu, select Connect to Server...
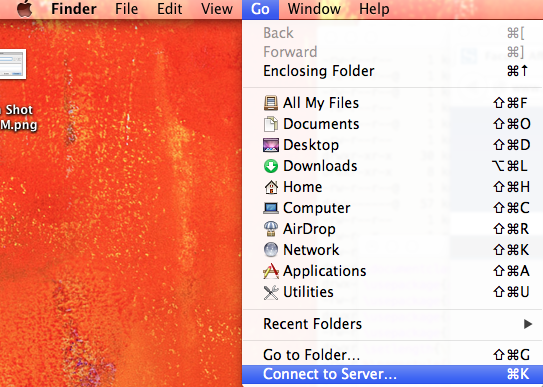
You will be presented with a window to enter the server address. Change the server address if necessary to match the following image.
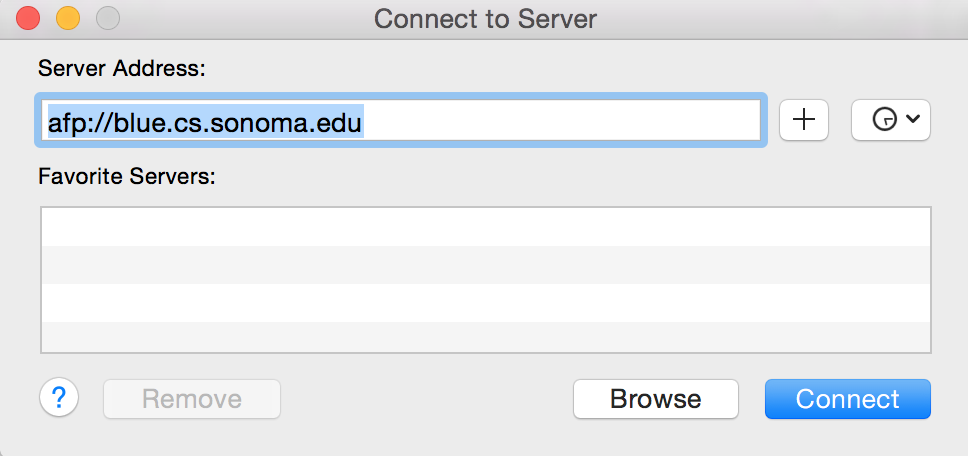
-
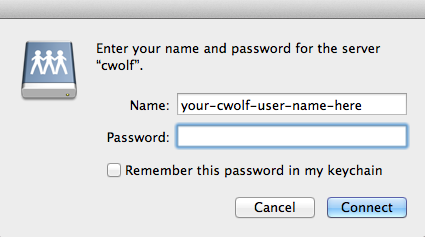
Click on Connect to get a prompt from blue to log in. Enter your blue login-name and password and then click on Connect.
-
You should see your blue login-name here.
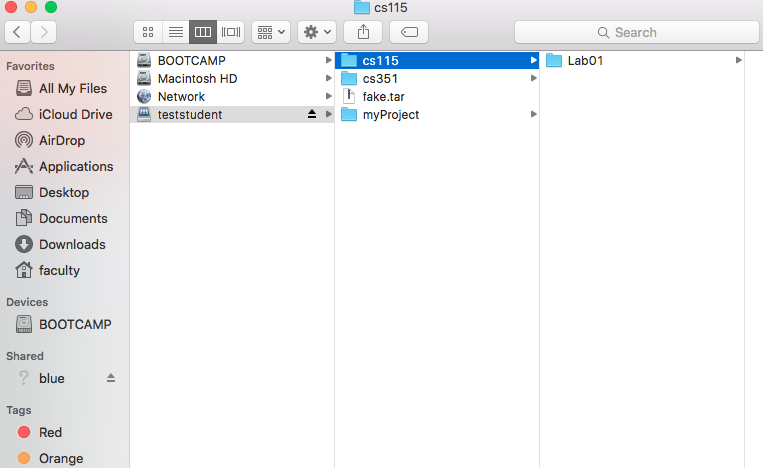
Below, we have used teststudent, a student account that we use for testing, to log into blue. Notice that on the left menu, under Shared, the icon for blue should appear as a mounted disk. You can always click on this icon to get to your blue home-directory.
Make sure you have a folder called cs115 in your blue home-directory for your class materials. If one does not exist, create it by right-clicking and select "New Folder".
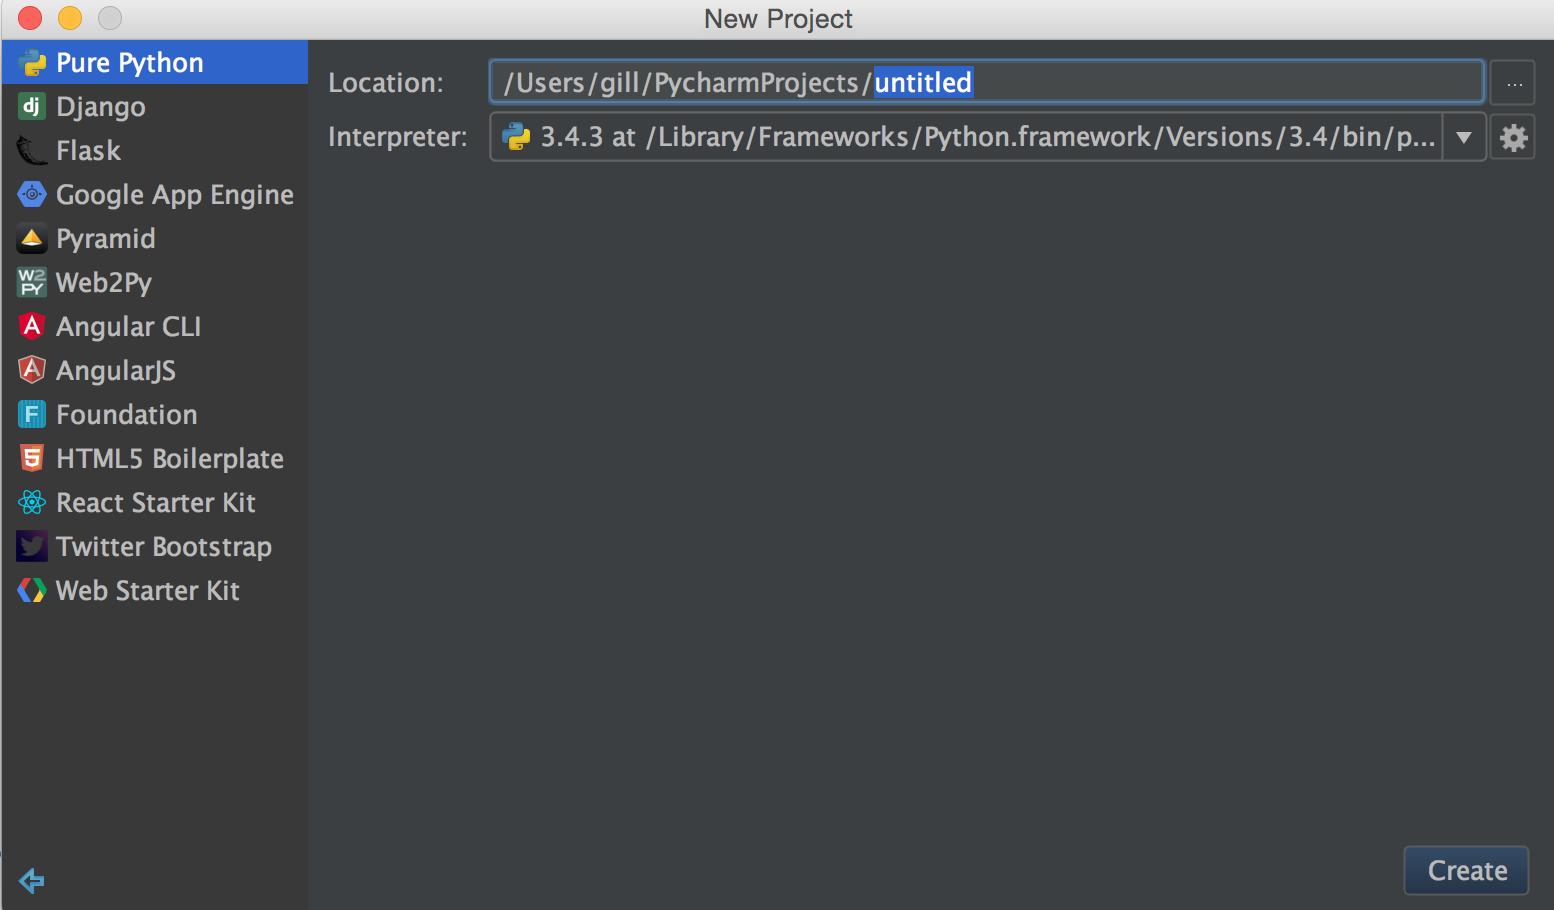
Now, launch PyCharm.

Click on Create New Project. Notice that the default is to create the project on the local machine. We do not want that. So, click on the three dots on the right side Location to select a directory through the Finder.
-
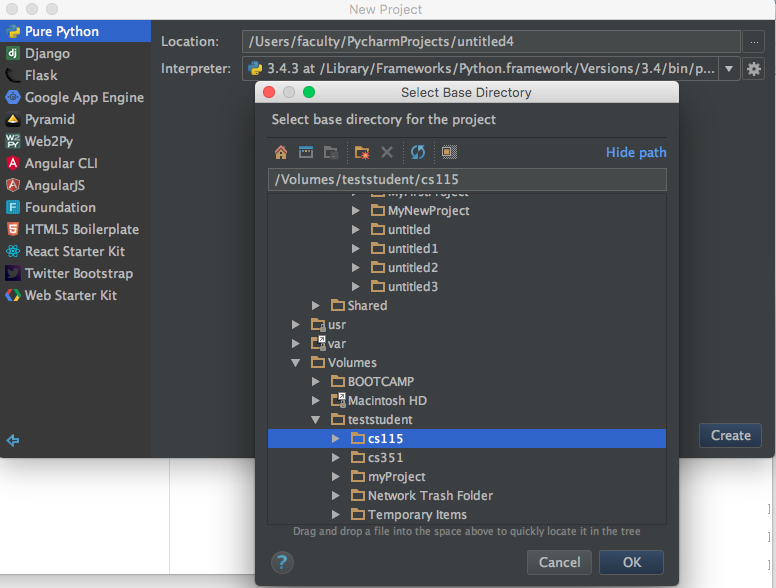
A window opens up asking you to select base directory. For that scroll down and look for Volumes, then select the CS115 folder as shown below.
-
After having clicked OK, we get the old window back with the Location shows as "/Volumes/teststudent/cs115". Modify this manually by adding "/Lab02" in the end to get the window below. Click Create.

-
Notice that the folder Lab02 shows up in Finder under cs115 directory.

-
Back to PyCharm, double-click on Lab02 on top-left to see the window below
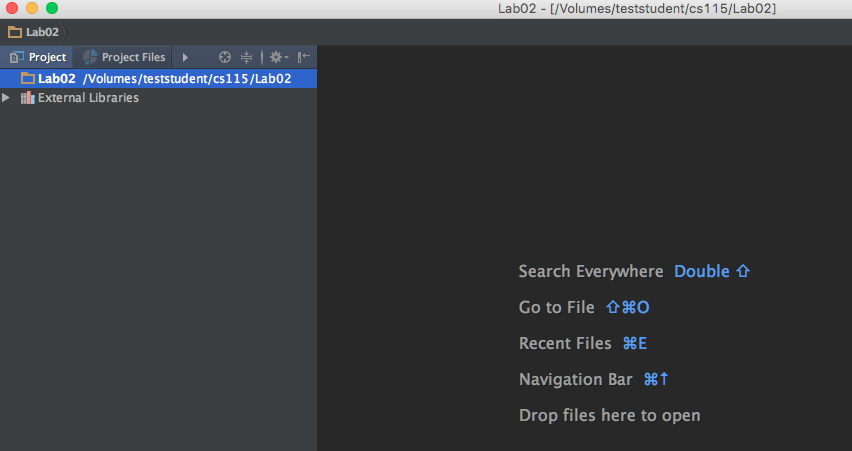
-
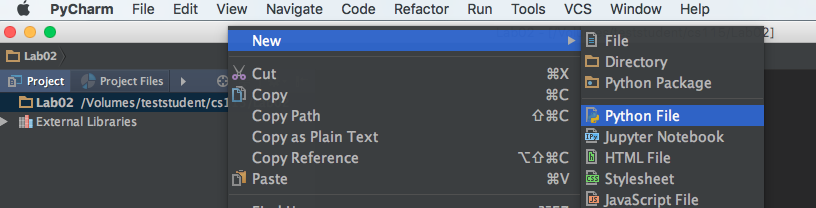
Let's create a new file. Right click on Lab02 and select New->Python File. In the window that opens up enter the name of the file as lab02.py and press OK.
It looks just as if it were created on the local machine..

It would be helpful to get in the habit of pressing Command-S to save your file just before you run it.