Laboratory Exercise on Transforming Pictures
In this digital age, images commonly consist of a large number of dots or pixels, arranged in a grid pattern, called a raster. Using this approach, the overall representation of pictures is called raster graphics
Although the division of pictures into dots breaks an overall image into distinct pieces, human vision combines these pieces into an integrated whole. For a typical Web page, images are divided into 72 dots per inch (dpi) — providing a picture of reasonable quality while also allowing the image to load in a reasonable amount of time. Turning to paper, a medium-resolution printer may allow pictures to be divided into 300 dots per inch, and high-resolution printers may handle images divided into 600 dpi or even 1200 dpi.
With this organization of image data into dots, the storage of images reduces to two basic issues:
-
What to store for each dot or pixel?
-
How to organize pixels into an overall image?
The first part of this reading examines these two matters. The reading then discusses several technical details and provides an example.
Organization of this Reading
Pixels
Although several image formats exist, a common specification for a pixel involves a red, green, and blue (R/G/B) component, and each color component may take values between 0 and 255. Since the values 0..255 comprise one byte (the size of a char in C), each component is commonly stored as a char value. In this context, negative values are not meaningful, so each component is considered an unsigned char. Further, the red, green, and blue (R/G/B) components naturally fit together as part of a logical package — a struct in the context of C. With this in mind, MyroC defines a pixel as follows:
**
 * MyroC struct for a pixel
 */
typedef struct
{
  unsigned char R; // The value of the red component
  unsigned char G; // The value of the green component
  unsigned char B; // The value of the blue component
} Pixel;
Within this framework, R/G/B values of 0 correspond to black and R/G/B values of 255 correspond to white. This leads to the following natural definitions:
Pixel blackPix = {0, 0, 0};
Pixel whitePix = {255, 255, 255);
Pictures
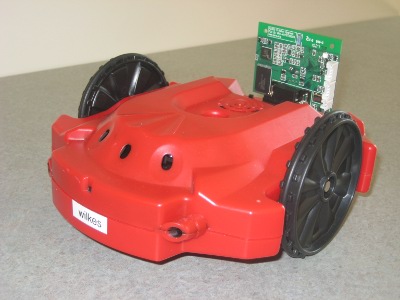
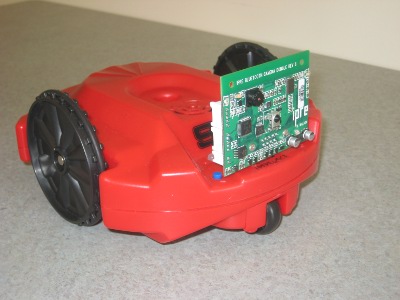
Perhaps the most conceptually-simple structure for a picture involves a two-dimensional array of R/G/B pixels. Each picture has a height and a width, and an overall picture is just a two-dimensional array with those dimensions. When working with a Scribbler 2 robot, the camera on the original Fluke takes a picture that is 192 pixels high and 256 pixels wide, while a picture from the newer Fluke 2 is 266 pixels high and 427 pixels wide. Of course, other cameras or images may have a different dimensions.
A pragmatic detail: You may recall from working with one- and two-dimensional arrays that the declaration of a two-dimensional array allocates space, but the array name just gives the base address, not the height and width dimensions, We cannot infer the dimensions of the array given only the variable name. For this reason, it is convenient to store the dimensions of an image together with the two-dimensional array. Thus, in much processing, the height, width, and pixel array are naturally part of a single package or struct.
In MyroC, the following struct provides adequate space for a range of image sizes:
/**
 * MyroC struct for a picture object
 */
typedef struct
{
  int height;       // The actual height of the image, but no more than 266
  int width;        // The actual width of the image, but no more than 427
  Pixel pix_array[266][427]; // The array of pixels comprising the image
} Picture;
Some Technical Details
Although the organization of images into dots or pixels may seem reasonably straightforward at a conceptual level, numerous technical details arise when processing pictures within a computer. Five such considerations are:
This section explores several technical matters for each of these areas.
Image Sizes
The storage of images presents an interesting challenge in the context of MyroC and the C programming language.
-
In principle, a rectangular image can have any [positive] height and any [positive] width. For example, the size of an image taken by a Scribbler 2 depends upon the Fluke card that is plugged into the robot.
- Images for the original Fluke are 192 pixels high by 256 pixels wide.
- Low-resolution images for the Fluke 2 are 266 by 427.
- Users might wish to create and transform their own images, and a user might naturally want to determine the size of their pictures.
- [High-resolution images from the Fluke 2 (e.g., 800 by 1280) are not practical, due to memory constraints and thus are not available in MyroC.]
-
As already noted, it seems particularly natural to store an image in MyroC as a 2-dimensional array, with the rows and columns corresponding to the picture's grid of pixels.
-
The C programming language, however, requires the size of a 2-dimensional array to be specified when the array is declared, and access to pixels in a 2-dimensional array is possible only when the number of columns is known when a program is compiled.
Altogether, users may run their programs with either an original Fluke or with a Fluke 2 (or even both types of Flukes), and users may wish to create pictures of varying sizes. Yet, C requires 2-dimensional arrays to have a specified number of columns (determined at compile time).
MyroC resolves this problem by recording the height and width of an image as fields in the Picture struct and by declaring the struct's pix_array to be sufficiently large (266 pixels high by 427 pixels wide) to accommodate any Fluke version. Further, user-defined images may have any size, as long as height ≤ 266 and width ≤ 427.
With this arrangement, sufficient space is available for a wide range of image sizes; not all space may be used for each picture, but the 2-dimensional array size within the Picture struct is adequate for many applications.
Rows and Columns
As a separate potential complication, a pixel labeled [i][j] might be considered in either of two ways:
-
i, j might refer to the ith row and jth column, or
-
i, j might representing moving horizontally i pixels and then vertically j pixels.
Unfortunately, these two interpretations are exactly opposite regarding which index represents a row and which a column. In addressing this possible confusion, MyroC consistently follows the first interpretation:
all MyroC references to a pixel are given within an array as [row][col].
Image Formats
Since image processing is used in a wide variety of applications, several common formats are used to store image data. The approach here, with an array of R/G/B pixels, is conceptually simple. However, other formats are possible as well.
-
The camera in a Scribbler 2 robot actually uses a different color designation (YUV format). Behind the scenes, the Scribbler transmits YUV values to your workstation, where the rGetPicture function transforms the YUV color coding to the more common RGB format.
-
Since images can consume much space, various formats are used to compress file sizes to speed the transmission of images and to reduce storage requirements. Each format has specific advantages for certain purposes. The .jpg or JPEG format was created by the Joint Photographic Experts Group (hence the acronym) and is largely based on what people actually see. Since this format is particularly common, MyroC provides functions to convert between RGB format and JPEG format for various purposes.
- rSavePicture stores your RGB picture from main memory as a file using jpeg format.
- rLoadPicture loads a jpeg image from a file into main memory, resulting in an RGB struct.
- rDisplayPicture displays your RGB picture from main memory onto a window at your computer.
See the MyroC header file for details on each of these functions.
Pictures as Parameters
Since MyroC's Picture is a struct containing a 266 by 427 array of 3-byte Pixels, one Picture requires about 340,746 bytes of data. This size has at least two consequences.
-
Allocation of memory for multiple copies of the same Picture can waste space.
-
Copying the same Picture from one place to another takes some time (even at the processing speeds of computers).
Further, in a normal function call, C copies a struct in the same way that C copies the value of a int, float, or double. That is, suppose a function has the header
void func (Picture pic)
Then the call func (pix) (perhaps in main) copies all Pixel values in the pix_array of pix to the corresponding array for parameter pic within func. As a result, function calls with Picture parameters are generally time consuming.
For this reason, many Picture functions within MyroC utilize a pointer to a Picture, rather than the Picture itself. For example, the function to display a Picture on the terminal has the header
void rDisplayPicture (Picture *pic, double duration, const char * windowTitle)
and a typical call (from a main procedure) might be
rDisplayPicture (&pic, 5.0, "original pic");
In this call, the address of a Picture, &pic is the first parameter. With this call, the designated image will be displayed for a 5.0 seconds duration, and the image will appear in a window with the title "original pic".
Some Potential Run-time Considerations
As a struct containing a 2-dimensional arrays of pixels, a Picture requires a moderate amount of space. In particular, an individual Pixel requires 3 bytes of main memory, so a 266 by 427 array of Pixels requires 340,746 bytes of memory. A typical int often requires 4 bytes, so an entire Picture in MyroC requires about 340,754 bytes of memory. Such space is readily available in modern computers.
However, operating systems often limit the amount of memory allocated when running an individual program, and this can impact applications — particularly if a MyroC program has arrays of images. Here are some observations on recent Linux and Mac OS X systems.
- Experimentally, an array of up to 94 (not 95) Pictures may be allowed.
-
Behind the scenes, the display of images requires that image data
be copied, so the display of many images may not work.
- If a program hangs when working with Picture variables, the issue may involve lack of space on the run-time stack.
- To utilize a modest number of Pictures, use "ulimit -s" command, as needed, in a terminal window.
- For example, ulimit -s 32768
- Sizes above 32768 may not be allowed in Linux or Mac OS X.
Example: Creating and Displaying a Stripped Image
To illustrate several elements in the creation, editing, display, and saving of an image, consider the program picture-example.c that displays both an all-black image and the striped image shown at the right.
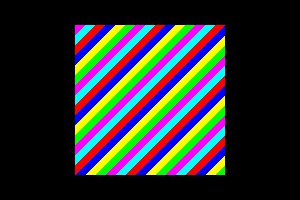
A 200 high by 300 wide image, with a black border and with diagonal, multi-color stripes.
The main procedure of this program provides a high-level overview of the processing involved.
int main ()
{
  printf ("program to create, display, and save an image\n");

  printf ("creating and displaying a black image\n");
  Picture pic = create_black_image (200, 300);
}
Program Notes
-
Although this program uses the MyroC library for image processing, work here does not require work by a Scribbler 2 robot. Thus, this program does not contain a call to rConnect.
-
After initial printing, main declares the variable pic as a Picture.
- As with numbers (but unlike arrays), C allows the copying of a struct using an assignment statement.
- After allocating space for variable pic, this program calls procedure create_black_image to generate an all-black image of size 200 high by 300 wide.
- When create_black)image finishes, the Picture struct that it returns is copied into variable pic.
  /* Display image for 5 seconds in window called "original pic" */
  rDisplayPicture (&pic, -5.0, "original pic");
-
The function rDisplayPicture displays the designated image in a terminal window.
- As noted above, the address of the image parameter for rDisplayPicture is used, so the large image does not have to be copied (for efficiency).
-
The second parameter (duration) has the same blocking and and non-blocking options
available for robot motion. Use a positive duration for a blocking command;
use a negative duration for a non-blocking command.
- The -5.0 value here indicates display of the image will be non-blocking. That is, processing will continue after this image is first displayed.
- With this non-blocking command, the striped picture will be appear shortly after the black picture, and a user will be able to see both images at the same time.
- The third parameter for rDisplayPicture specifies the title to be used for the image in the terminal window.
  printf ("adding stripes to image and displaying the result\n");
  add_stripes (&pic);
-
Since the function add_stripes is required to change the image pic, we pass the address of pic in main
rDisplayPicture (&pic, 5, "striped pic");
-
This call to the function rDisplayPicture is blocking.
- The second parameter (duration) is positive 5.0, so the image is display and processing stops for 5 seconds. This allows the user to view both the previous image and this striped image at the same time.
- Since the third parameter "striped pic" is different from the string given in the previous call, two different windows appear on the screen — one with each specified title.
  printf ("saving picture to file called 'striped-picture.jpg'\n");
  rSavePicture (&pic, "striped-picture.jpg");

  return 0;
-
MyroC's rSavePicture saves a Picture file in .jpeg format.
- The first parameter is the address of the Picture to be saved. As discussed earlier in this reading, the address is passed to avoid having to copy the entire image when the procedure call.
- Although any string can be given as a file name in the second parameter, the image itself will be saved in .jpeg format, so a string ending in ".jpg" or ".jpeg" is encouraged.
Turning from the main program to the separately-define functions, function create_black_image illustrates how assignment statements may be used to specify various details of an image.
/* procedure to create and return an image that is all black */
Picture create_black_image (int height, int width)
{
  int i, j;
  Picture newPic;
  Pixel blackPix = {0, 0, 0};
-
Since create_black_image creates an image with all pixels being black, the user need only supply the height and width of the desired Picture.
-
newPic is a local variable that will contain the needed components of an all-black image.
- Although newPic is local, this struct is returned by the function. Thus, the values in newPic will be copied to another variable when this function returns.
  /* set dimensions of new picture */
  newPic.width = width;
  newPic.height = height;

  /* iterate through all pixels in the picture, setting each to black */
  for (i = 0; i < height; i++)
    for (j = 0; j < width; j++)
      newPic.pix_array[i][j] = blackPix;

  return newPic;
}
-
The width and height fields of NewPic are assigned the desired dimensions.
-
The nested loop sets each pixel of the Picture to black.
Some details in creating an image with stripes may be somewhat tricky. However, the basic approach to transforming an image by iterating through a block of pixels is quite common.
/* procedure to add stripes to a picture */
void add_stripes (Picture * pic)
{
  /* Define an array of pixel colors */
  Pixel colorPalette [ 6] = {
                               {255, 0, 0},    /* red */
                               {0, 0, 255},    /* blue  */
                               {255, 255, 0},  /* redGreen */
                               {0, 255, 0},    /* green */
                               {255, 0, 255},  /* redBlue*/
                               {0, 255, 255}  /* blueGreen*/
                             } ;
-
Since this add_stripes function must change a struct in the main procedure, the parameter pic is an address of a struct declared elsewhere.
-
This procedure will utilize six colors for alternating stripes. For convenience, the six colors are defined in the colorPalette array.
  /* in adding stripes to the image,
        leave 25-pixel border unchanged at top and bottom
	leave 75-pixel border unchanged at left and right
  */
  int row, col;

  for (row = 25; row < (*pic).height - 25; row++)
    for (col = 75; col < (*pic).width - 75; col++)
      {
        /* stripes will be 10 pixels wide,
	   and will repeat every 6 colors */
	int colorIndex = ((row + col) / 10) % 6;

	(*pic).pix_array[row][col] = colorPalette [colorIndex];

      }
}
-
The updated Picture will have a black border; only a 150 pixel by 150 pixel square in the middle of the original image will be changed. Hence, the loops do not cover all pixels in the pix_array, but rather touch only the rows and columns that must be changed.
-
Stripes are achieved through a sequence of arithmetic operations.
- The sum row+col produces the same sum in a 2-dimensional array, when one moves either up to the right or down to the left. Thus, this sum is the same along diagonals.
- To give stripes that are 10 pixels wide, we want the same color to be used for 10 successive row+col pixels. Dividing by 10 (row+col / 10) ensures this same result for a diagonal band of pixels of width 10.
- The striped image should repeat the 6 contrasting colors of the colorPalette array. Taking a remainder after dividing by 6 (e.g., (row+col / 10) % 6) provides a convenient mechanism to repeat the color sequence throughout the revised image.
Example 2: Editing Two Images
As a second example, the following program swap-red-blue.c takes two pictures and swaps the red pixels of the first with the corresponding blue pixels of the second. Together, this example illustrates working with arrays of pictures, the height and width of a picture, the pixels of a picture, and the individual red/blue/green colors within a pixel.
/* program to take 2 pictures and
   swap red pixels of picture 0 with blue pixels of picture 1
*/

#include <stdio.h>
#include "MyroC.h"

int main ()
{
  printf ("program to take 2 pictures and transform them\n");
  Picture pics [2];
Program Notes for swap-red-blue.c
-
Since pics is an array of two Picture elements, pics[0] will be one Picture and pics[1] will be a second Picture.
  /* get started with MyroC and picture taking */
  rConnect ("/dev/rfcomm0");
  pics[0] = rTakePicture ();
  pics[1] = rTakePicture ();
-
After connecting to the robot, two pictures are taken.
- rTakePicture() returns a Picture, and C allows one struct to be copied to another with an assignment statement.
- Here the first picture is copied to pics[0] — the first struct in the pics array.
- The second picture is copied to pics[1].
  /* display original pictures */
  rDisplayPicture (&pics[0], -8, "Original picture 0");
  rDisplayPicture (&pics[1], -8, "Original picture 1");
-
rDisplayPicture displays two pictures.
- The first parameter provides the address of each Picture.
- Both display commands are non-blocking; the negative value (-8) indicates the image will stay visible for 8 seconds, and other processing can continue while the image is shown.
- Two window titles are given, so the user will be able to see both pictures (in different picture windows) at the same time.
  /* swap pixel colors */
  int row, col;
  for (row =0; row < pics[0].height; row++)
    for (col = 0; col < pics[0].width; col++)
      {
        unsigned char temp = pics[0].pix_array[row][col].R;
        pics[0].pix_array[row][col].R = pics[1].pix_array[row][col].B;
        pics[1].pix_array[row][col].B = temp;
      }
-
The syntax for accessing pictures, pixels, and colors proceeds in methodical pattern.
- pics is an array of Pictures, so
- pics[0] is one element of the array — an individual Picture.
-
Since a Picture is a struct with a height and
width field,
- pics[0].height is the height field for the Picture designated pics[0] in the pics.
- pics[0].width designates the width field for that Picture. pics[0].pix_array specifies the 2-dimensional array of pixels for the Picture designates pics[0].
- Given a 2-dimensional array pics[0].pix_array, one can access a particular element within the array with a row and column index: pics[0].pix_array[row][col].
- The pix_array in a Picture is an array of pixels, so pics[0].pix_array[row][col] is a Pixel with R, G, and B fields.
- Within the Pixel given by pics[0].pix_array[row][col], the R is given by pics[0].pix_array[row][col].R.
-
Swapping values stored in two variables, var1 and var2 involves three steps:
- temp = var1 — store the value in var1 for later reference
- var1 = var2 — move the value in var2 to var1
- var2 = temp — move the original value from var1 (now stored in temp to var2.
-
The program swaps pixels, using the three-step swapping process, for all pixels in the given pictures.
  /* display transformed = pictures */
  rDisplayPicture (&pics[0], -8, "Transformed picture 0");
  rDisplayPicture (&pics[1], -8, "Transformed picture 1");

  rBeep (5.0, 0);

  rDisconnect ();

  return 0;
}
-
Once the images are transformed, the revised images are displayed in different windows, so the user can see both the original and the revised pictures.
-
The rBeep command delays processing for 5.0 seconds, so the user can view the images before the program ends and the images disappear.
|
created 2 August 2011 by Erik Opavsky revised 8 August 2011 by Erik Opavsky modest editing 23 October 2011 by Dilan Ustek and Henry M. Walker modest reformatting 6 November 2011 by Henry M. Walker minor editing 25 October 2013 by Henry M. Walker reformatting, modest editing, discussion of 2D storage 1-2 February 2014 by Henry M. Walker readings added 19 September 2014 by Henry M. Walker lab reworked 29 December 2014 by Henry M. Walker separate, expanded reading created 20-23 October 2016 by Henry M. Walker |
|
| For more information, please contact Henry M. Walker at walker@cs.grinnell.edu. |
