Laboratory Exercise: Conditionals
This lab introduces a different types of conditional statements in C, gives practice using conditional statements to control program execution, and provides experience using the Scribbler 2 sensors.
Work Started in Class
Clarifying the if Statement
-
Consider the code segment:
int TEST;

TEST = 1;

if (TEST)
   printf ("statement 1\n");
   printf ("statement 2\n");

if (TEST)
   {
      printf ("statement 3\n");
      printf ("statement 4\n");
   }

if (TEST)
   printf ("statement 5\n");
else
   printf ("statement 6\n");
   printf ("statement 7\n");

if (TEST)
   printf ("statement 8\n");
else
   {
      printf ("statement 9\n");
      printf ("statement 10\n");
   }

if (TEST == 1)
   printf ("statement 11\n");
else
   printf ("statement 12\n");

if (TEST = 1)
   printf ("statement 13\n");
else
   printf ("statement 14\n");
Include this code segment within a program.
- Compile and run the program, and review its output. Explain why the output is obtained. (Be sure to comment on why "statement 7" is printed.)
- Change the original assignment TEST = 1 to TEST = 7 and repeat Part a.
- Change the original assignment TEST = 1 to TEST = -23 and repeat Part a.
- Change the original assignment TEST = 1 to TEST = 0 and repeat Part a.
Using Sensors
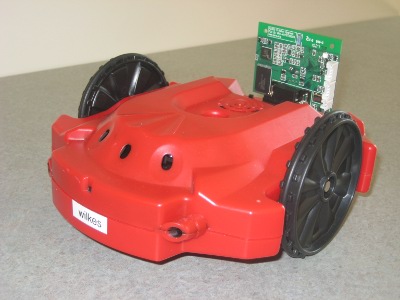
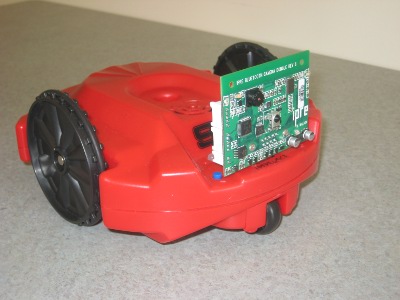
When using the Scribbler 2 robots, activities may depend upon the immediate environment of the robot. To learn about this environment, Scribbler 2 robots contain several sensors. This lab utilizes four types of sensors to provide experience with conditional statements.
Be sure to review the course's description of Sensors for the Scribbler 2 Robot before proceeding in this lab. As you will see, some sensors are located on the robot itself, and some are located on the Fluke that plugs into the robot. A common error for beginners is to program based on sensors located in a different place than expected.
When working with the Scribbler robots, conditionals are how the robot can be programmed to make decisions based on data gathered from its sensors.
As electrical instruments, all sensors are subject to experimental error. That is, multiple queries to a sensor may yield different results. For some sensors, this variability may be modest, but for other sensors, successive queries may produce substantially different results.
To manage some variability, the MyroC package takes several readings and averages. In particular, most sensor functions include a second parameter that specifies how many values from the sensor should be averaged. For example, the following call takes 3 readings and returns their average:
int avgValue = rGetLightTxt("left", 3);
Of course, with this syntax, getting a single reading corresponds to giving the second parameter the value 1.
Using Light Sensors
According to the course documentation for Sensors for the Scribbler 2 Robot, the light sensors on the front of the Scribbler 2 robots are reasonably consistent, so we start there. Note that the light sensors return values near 0 for bright lights and large values (about 65,000) when the area is quite dark.
-
Copy the program light-sensor-example.c to your account. Note the code contains instructions regarding how to compile.
Compile the program and run it several times to determine how it works.
- For some runs, do not move the robots, and examine the output to determine what variability is present in the readings printed.
- For some runs, move the robot so it is facing a relatively bright light or a relatively dim area. Again, compare the results obtained.
-
Add statements to determine the light levels in front of the robot and on the right.
- To what extent do the light levels seem to vary from the left to the center and to the right?
- How might you change the robot's environment (e.g., cover some sensors, or create a shadow over part of the robot) to impact the light readings?
Using the Obstacle Sensors
One set of obstacle sensors utilize the IR sensors on the Scribbler 2 body, and another set of obstacle sensors utilize sensors on the fluke. Again, review Sensors for the Scribbler 2 Robot for details.
-
Use the IR sensors on the Scribbler 2 body to determine whether there is an obstacle in front of the robot. This can be done using the the rGetIRTxt function. Unlike the light sensors, the function returns only a one (true), or zero (false) depending on whether there is an obstacle close to the scribbler's IR sensors.
As with the light-sensor-example.c program, report several readings, and comment upon the variability that you observe.
-
Change the robot's behavior, depending upon whether or not an obstacle is present. If an obstacle is present, the program should beep three times at a high pitch. If there are not obstacles in front of any of the sensors, it should move forward for 1 second.
Avoiding Obstacles
Testing one sensor is great, but the robot has two IR sensors. It would be more interesting if we tested both the sensors and acted according to the resulting values. To do this you can employ an else if test.
-
Rather than beeping, consider telling the robot to turn if it senses an obstacle in front of one of its sensors. If there is an obstacle in front of the left sensor, turn right, and if there is an obstacle in front of the right sensor, turn left. This is a simple, but effective, way to avoid an obstacle.
Change your code so the robot behaves as described. One way to proceed would be to use the following form:
  if ( left sensor )
      turn right;
  else if ( right sensor )
      turn left;
Expand this outline to actual C code, and include it in a program. Then compile, run, and verify your code works before moving on.
For future references (i.e., for the Homework section of the lab), test what happens in the case where there is an obstacle in front of both sensors.
Homework
Testing Two Things at Once
As with earlier commentary in this lab, these notes are based on comments by David Cowden.
Consider where there is an obstacle in front of both sensors. Using the previous code, first it would check if there is an obstacle in front of the left sensor. Since there is one, it would turn right. Then it would go on to whatever comes next, which could be going forward. However, the left sensor could still have the same obstacle in front of it if the robot didn't turn enough.
How could we make this code work better? The following outline suggests a more detailed response to different circumstances. (As in Step 6, the outline would need to be translated to actual C code in order to run.)
    if ( left sensor && !right sensor)
        turn right;
    else if ( !left sensor && right sensor)
        turn left;
    else if ( left sensor && right sensor )
        turn 180 degrees;
    else
        go forward;
This checks for any situation that might occur and tells the robot what to do in each one.
The problem becomes even more prevalent if the data from the sensors was gathered beforehand (as they should be), and then the tests were executed:
    int left  = rGetIRTxt ("left", 3);
    int right = rGetIRTxt ("right", 3);
    if ( left )
        turn right;
    else if ( right )
        turn left;
In this case, if both were true, the robot would just turn right, then turn left, and end back where it started.
It is very important that you consider when exactly you are asking for sensor data from the robot. The above example illustrates the generally correct method of gathering data before examining it. To illustrate the importance, consider the following code:
    if ( rGetIRTxt("left", 3) && other_condition1 )
        result1();
    else if ( rGetIRTxt("left", 3) && other_condition2 )
        result2();
    else if ( rGetIRTxt("left", 3) && other_condition3 )
        result3();
    else if ( rGetIRTxt("left", 3x) && other_condition4 )
        result4();
By placing the call to the function rGetIRTxt in the if statement, you are actually gathering the data four [different] times. Calling the function many times is less efficient than calling it once, giving the value to a variable, and just using that variable. Suppose the robot is moving beforehand. When the program gets to the first test, rGetIRTxt fails and so execution moves on to the first else. But, by now the robot has moved in range of an obstacle. The value for rGetIRTxt would then be different when the robot is queried again -- causing the first else if to pass based on the altered value of the IR sensor. If you examine the logic in the case that all other_conditions are true, the program never should have gotten to the first else if if the value of rGetIRTxt was initially false .
To avoid the situation altogether, store the value from one call to rGetIRTxt first. Then perform all the tests on that variable.
The && and || Operators
To combine two tests, use the && (AND), and || (OR) operators. If you want certain code to execute only if both tests are true, use the AND operator. If your want to do something if either test is true use the OR operator.
-
Copy the program combine-tests.c to your working directory and open it in an editor. This program is similar to parts of what you may have done in Steps 3 and 4 of this lab.
-
Modify the program, so that the robot moves backwards if both sensors are blocked. That is,
- if both sensors are blocked, the robot should move backward
- if only the left sensor is blocked, the robot should turn right
- if only the right sensor is blocked, the robot should turn left
-
As a further variation, insert the following code within your program.
    if ( left || right )
      rBeep(1, 550);
What happens when you put an obstacle in front of any of the sensors?
-
Blocking and Nonblocking Commands
The Scribbler 2 movement commands may be organized into two basic groups:
-
Limited Duration Commands: A duration parameter is part of the commands rTurnLeft, rTurnRight, rForward, and rBackward. For each of these commands, the robot follows the movement for a specified amount of time and then stops or in the non-blocking situation the movement will keep going until another motion command is given.
-
Ongoing Duration Commands: No duration parameter is given for the commands rMotors and rStop. Once any of these commands is given, the robot will continue to follow that motion until a subsequent command is given.
-
Consider the following code segment which includes a movement command and the sounding of three notes.
   rForward (1.0, 5.0);
   rBeep (1.0, 880);
   rBeep (1.0, 1280);
   rBeep (1.0, 1760);
- Include this code segment in a program, and observe what happens. When the motion starts, do the beeps sound as the robot moves (nonblocking movement), or do the beeps sound after the robot movement has finished (blocking movement)?
- Change the duration in rForward from 5.0 to -5.0. Then repeat part a.
Write, in your own words, what it means for a command to be blocking or nonblocking.
-
Copy blocking-nonblocking.c to your account, run the program, and explain why it behaves as it does. Does some or all of the program use blocking commands? Explain.
Another Approach for Conditionals: the Switch Statement (Optional)
-
Programs conditional-lightSensor-1.c and conditional-lightSensor-2.c categories of light intensities were identified through a sequence of if statements, and the programs beeped based on the category identified.
- Compile and run these programs several times to observe how they work.
-
Examine the code for the two programs.
- Will these programs always produce the same results? Explain why or why not.
- Are the two programs equally efficient? Explain why or why not.
-
Program light-sensor-switch.c is modified from the programs in the previous Part. In those programs, categories of light intensities were identified through nested if ... else if statements. Since the categories were organized in 10,000 groupings of light intensities, division of the light intensity by 10000 provides a simple way to identify the relevant category. This gives rise to the use of a switch statement.
Compile and run light-sensor-switch.c under different light conditions. Then review the code to determine how they work.
-
Remove the break statements from the program, and run them again. Explain in your own words what purpose the break statements address.
|
created 22 July 2011 by David Cowden last full revision 29 July 2011 by David Cowden minor editing 24 August 2011 by Henry M. Walker moderate editing 3 October 2011 by Henry M. Walker moderate editing 5 October 2011 by Dilan Ustek editing (wording for cp, html corrections) 20 July 2012 by Henry M. Walker editing (updated URL) 10 September 2013 by Henry M. Walker reorganized 25 January 2014 by Henry M. Walker readings added 19 September 2014 by Henry M. Walker links updated 1 February 2018 by Henry M. Walker |
|
| For more information, please contact Henry M. Walker at walker@cs.grinnell.edu . |
