Linux/Mac OS X Basics
for CS 115 at Sonoma State University
The original Unix operating system and its successors, Linux and Mac OS X, were designed to support the common tasks and needs of computer users. In practice for CS 115 at Sonoma State University, laboratory work will utilize a Linux-style interface together with a graphics-based environments:
- Some activities (e.g., editing, storing materials on a file server) will utilize a graphical user interface (a GUI), with which you can use a mouse to point at windows and menus and then click your mouse to accomplish various tasks.
However, this course does not assume previous work with a computer—if you have not used graphical interactions, don't panic, you'll get lots of experience through the course—just ask as questions when they arise!
-
Some activities (e.g., running programs) require work in a text-oriented environment called a Terminal window.
For many students, working with a Terminal window will be a new and different experience. However, unfamiliar does not mean hard—with a little practice, you'll get used to this environment before long, so don't panic!
Introduction
This laboratory exercise provides initial practice with both of these environments, in the context of doing several tasks that will be used almost every day of the semester. Basic tasks fall into three main categories.
- Working with a Terminal window: focusing on some commands to set up your work on a lab workstation.
- Setting up a file server: creating/organizing directories/folders for long-term storage of files.
- Preparing for next steps: copying files and organizing work in anticipation of programming in C in the next lab and beyond.
More information about various parts of this lab is available through two readings:
Work Started in Class
Working with a Terminal Window
Although using a mouse provides many convenient capabilities on modern computers, some tasks cannot be done using a mouse to point and click, and other tasks are cumbersome with a mouse only. In particular, most C-based work involves use of a Terminal window, because this environment allows a user to take advantage of many powerful capabilities of the Linux and Mac OS X operating systems.
This lab starts with some basics.
As noted above, many [most?] students starting CS 115 may find working with a Terminal window a snew and different experience. However, with a little practice, you'll become comfortable with environment before long!
Opening a Terminal Window
-
When working with programs (e.g., running them), you will need to work with a Terminal window—an area where you type commands, and the machine responds. Opening and using a Terminal window can be done in either of two ways:
- If the Terminal Window logo is visible at the bottom of the screen, click on it.
- If the Terminal Window logo does not appear on the screen,
- Click on the "Finder" icon at the bottom left of the screen.
- When a new window appears, click on "Applications" on the left panel.
- Scan down the options to click on "Utilities" and then "Terminal.app".
Once the Terminal window opens, move your mouse to the window and click, so you will be able to type within that window.
The Terminal Window logo
Some Basic Commands
With the Terminal window open, we can experiment with several commands. At first, the commands may duplicate tasks that you could do with a mouse (point-and-click). However, using the Terminal window now will provide initial practice, anticipating later work (e.g., in the next lab) that requires using a Terminal window.
-
When a Terminal window opens, it recognizes the folder/directory where you logged in—a home directory for "student". To determine the full name of this directory, type
pwdpwd stands for "print working directory".
After typing this command, the computer will identify a directory where it is operating.
- If the computer responds
/Users/student/the computer is looking at the directory designed as the normal starting place for user student, and you can move on in the lab.
-
If the compuer does not respond /Users/student?, then
type
cdThis is a simple command that takes you to the starting place for user student
Once you see the response /Users/student, we can decipher what this response means. As explained in the Reading on Directories, files on Linux and Mac OS machines are organized into a hierarchy:
- / or "root" is at the base of the hierarchy
- Users lies one level below the root
- student is a folder or directory within Users
- If the computer responds
Some common commands are listed in the table below.
| Utility | Description |
| ls | "list" files and directories |
| pwd | "print working directory" |
| cd | "change (your working) directory" |
| mkdir | "make directory" |
| rmdir | "remove directory" |
| cp | "copy" a file or directory |
| mv | "move" a file or directory (i.e., rename it) |
| rm | "remove" a file (i.e., delete it) |
-
To see what folders and/or files are set up within a student account, type
lsor type the longer, more complete, version
ls -l- What files and directories are listed as being within the student home directory? (The results will depend on which workstation you are using.)
- What additional information is listed when you add -l to the ls command?
Throughout this section, you could use the "Finder" on your monitor (see the button on the lower-left of you screen) to view various files and directories. Although this can be a nice way of viewing elements of the file system on this machine, use the Terminal window now for practice, so you'll be more comfortable with the Terminal window for later CS 115 labs.
-
To explore further, type
cd ..Here, cd means "change directory", and two dots (..) represents the directory just above the current one in the hierarchy.
Again, use pwd and ls to determine the location being viewed in the Terminal window and the directories within this location. (You should see student as one of the directories.)
-
Again, type cd .. with pwd and ls to determine what lies above /Users in the hierarchy.
- What files are listed?
- What happens if you type cd .. again? Why do you think you obtain this result?
-
Return to your home directory with either of the following two commands
cd cd Users/students -
Move to your Desktop
cd Desktop
-
As an experiment, move back to the student home directory and then try moving to Desktop, but type "desktop" with a lower-case "d". Describe what happens.
Note that commands and files in Linux/Mac OS X are case sensitive.
-
Again from the student home directory, type
cd D- Now hit the Tab key. What happens?
- Press the Tab key a second time, and explain what happens.
- Now type "e", so the line reads
cd Deand hit the "tab" key. What happens? Why?
-
Move again to the Desktop and use ls to see what files and/or directories are present. (Likely, these are left from previous users.)
Within the Desktop, create a directory for your current work on this Workstation. Although you can use any name you wish (as long as the name has not been taken by someone else, I recommend you use a name "115" followed by your name. (You might use a dash in the name, but do not use spaces or other punctuation.) A sample command might be:
mkdir 115-walkerUse the ls command to check that this new directory was created has you expected.
For additional discussion about using a tab in this context, see the reading describing autocompletion
Copying Between Windows
Linux and Mac OS X allow you to cut and paste between windows.
- For Linux, you can use the left and middle mouse buttons without using the control Ctrl key.
- For Mac OS X, you can highlight a section of text with the left mouse button, and then use Open Apple/Command X or Open Apple/Command C to cut or copy text, respectively, and then Open Apple/Command V to paste.
-
Consider the following line, that when typed into a Terminal window, prints the time and date
date +'%I:%M %p on %A, %B %d, %Y'
To use this command, you could type the entire line into a workstation, but that would be tedious and error prone. Instead, try the following:
-
Highlight the above line using the left mouse button, and select the material as described in today's reading.
-
Move the mouse to the terminal window, and paste the line into the terminal, again using the process described in today's reading. (You may need to hit the return key after pasting the copied line.)
Note: On Linux, there is no need to use the control Ctrl key.
-
Setting Up the File Server
For technical reasons, all students log into CS Lab machines at SSU under a "student" account. This provides fine access for active work, but work cannot be saved on these machines over the long term. Rather, the department supports a file server for long term file storage. The following instructions outline how to access and set up your account on the departmental server.
setting Your Password in the Server
The CS file server has been set up, so that you have an account with a username that usually is your first initial and last name. (If that username already belongs to someone else, some variation is possible—see me for details.) The password when you first log in is your student ID. For security, you should log into the server once and change your password to something more private.
-
Log into the CS file server as follows:
-
In a Terminal window, type
ssh username@blue.cs.sonoma.eduwhere "username" is likely your first initial and last name. (See me for details.) - Enter your SSU student ID as your password.
-
Once logged in, type
passwd - You will be asked for your old password (currently your student ID).
- Next type in a new password twice to confirm .
- If no errors are reported, you are done. (See the instructor if troubles arise.)
-
Log out of the server by typing
logout
-
In a Terminal window, type
Working with the Server
-
To store (and retrieve) files from the departmental file server, you first must connect to the server in four steps:
- Move the mouse away from other windows and click.
- Type "command-k"
- Enter the connection string: afp://blue.cs.sonoma.edu
- Enter your departmental username and password
Although you are free to organize your files on the server in any way you wish, the following is recommended:
- Once connected to your account on the server, create a directory
for this course:
- Click on the server window.
- Click on the "File" menu for the Finder (in the upper left of your screen).
- Click on the option for "New Folder"
- Label the newly created folder "CS 115" or equivalent
- Within the CS 115 folder, create four additional subfolders,
following the same basic process you have just used:
- Folder "labs" for collaborative work you will do with a partner during class sessions
- Folder "projects" for additional collaborative work
- Folder "supplemental-problems" for assignments you will be working on alone.
- Folder "current-work" for labs in progress.
With a "current-work" folder, you could start each session by connecting to the departmental server and copying your recent work to the lab workstation. This might be an easy way to pick up work where you left off from a previous session.
Preparing for Next Steps
Looking ahead to later labs and activities throughout the semester, two actions may help streamline your work. Although these steps are optional, they are recommended as preparation for later in the course (e.g., for the next lab).
Copying a "Makefile" to your Directories
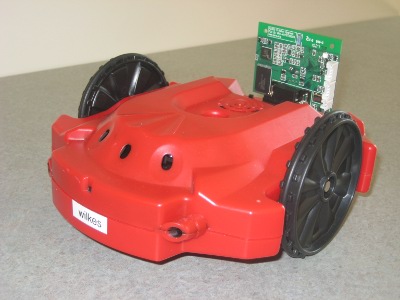
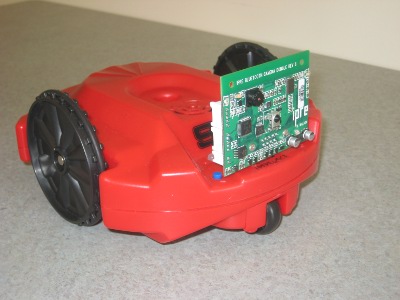
When working with the Scribbler 2 robots in a few days, logistics will be relatively simple if you download a file, and place copies in several directories.
-
Download the file Makefile to the working directory you created in Step 10. Be sure that the file is stored under the name Makefile, with an upper-case M.
-
Open a connection to your account on the departmental file server. Then
- Click on the Makefile in your Desktop 115 directory.
- Holding the mouse button down, copy it to each of your
Checking Settings on Aquamacs
If you have used a computer to help write a document, you likely have used an editor of some type. The Aquamacs editor provides appropriate functionality for developing programs, while maintaining a reasonably elementary user interface. Thus, Aquamacs is recommended for use in this section of CS 115.
Before writing programs, however, can be helpful to check that a few capabilities in Aquamacs are turned on to aid in the program-development process.
-
Starting Aquamacs: At the bottom of the screen, you might find an icon for Aquamacs.
- If so, just click on the icon to start the editor.
- If the appropriate editor icon is not present,
- Click on the "Finder" icon at the bottom left of the screen.
- When a new window appears, click on "Applications" on the left panel.
- Scan down the names given to find "Aquamacs.app", and click on the desired option.
- To create a new file with the editor, click on the "File" menu at the top-left of the screen and then click the "New File" option.
- To save the file,
- Use the "File" menu to select save.
- When a directory appears, click on "Desktop" and the directory/folder you wish to work with.
- Enter the desired name of the file, and click "Save".
The Aquamacs logo
created 15 January 2014 by Henry M. Walker, based on earlier
labs by
readings added 1 September 2014 by Henry M. Walker updated for C-based infrastructure 7-15 January 2015 by Henry M. Walker modification of .emacs suggested 21 January 2015 by Jerod Weinman updated for Mac OS X and general distribution 6 May 2016 by Henry M. Walker course home directory path clarified 25 August 2016 by Henry M. Walker revised for new window environment 30 August 2018, 2 September 2018 by Henry M. Walker revised for Sonoma State University January 14-15, 2022 by Henry M. Walker |
|
| For more information, please contact Henry M. Walker at walker@cs.grinnell.edu. |
