Goals
In this project, you will make a program that draws some tessellations. Each geometric shape that is tessellated will be written in its own function, which will be used repeatedly to fill the plane of the graphics window.
You will be practicing the following concepts from prior labs:
while-loops, nestedfor-loops- conditionals
- drawing shapes with the graphics package
- writing functions from specifications
- lists (via polygons and text manipulation)
Summary
A tessellation is a surface tiling of the plane using one or more geometric shapes. Ceramic tiling feature tessellations reached an artform in Persian, Islamic and Ancient Roman architecture. The tilings at the Alhambra palace during Spain's Moorish rule are held in especially high reguard for their beauty, diversity and complexity. Many have studied the patterns in these works. Famous among these are the 17th century German mathematician/astronomer Johannes Kepler, and the 20th century Dutch artist MC Escher.
You will write a program that draws so-called Wallpaper tessellations. These are tessellations that tile the entire plane, both right-to-left and top-to-bottom. The program prompts the user for what they want to draw, the size of the plane for the tiling, shows the requested drawing, lets the user click to close the window, and then repeats the process for the next drawing. This program will be built in stages: Checkpoint A, Checkpoint B, and then Final Code. There is a demo associated with each intermediate stage.
The final program is demonstrated in the short video below:
Part of this project is an exercise in implementing functions to their specification, and matching target outputs. It is not a creative exercise, but rather the opportunity for you to demonstrate understanding of specifications, control over the tools we've learned in the class, and being detail-oriented. You are asked to demonstrate the requested behavior and output, matching both the functions' docstrings and the sample output. In all samples, user input is shown in italics and underlined.
In contrast, the extra credit is a creative exercise, in which you can draw your own tessellations, or reproduce a tessellation you choose from existing drawings.
Due Dates
- Checkpoint A: Due as a demo in any lab, drop-in tutoring or workshop before Thursday, Nov. 9 at 7 PM.
- Checkpoint B: Due as a demo in any lab, drop-in tutoring or workshop before Thursday, Nov. 16 at 7 PM.
- Final Code: Due via Moodle on Tuesday, Nov. 21 at 11:55 PM.
Template
You will need the graphics package and the template for the project:
- Download the graphics package, graphics.py
- Download the template, template_P2.py
Drawing Regular Polygons
Return to this section for Checkpoint B, when we draw tessellations using hexagons and octagons.
A hexagon is a 6-sided regular polygon. An octagon is an 8-sided regular polygon. This section describes: (a) how to draw a polygon using the graphics library, (b) how to figure out the basic (x,y) points of an $n$-sided regular polygon and how to rotate it, (c) the properties of the hexagon and (d) the properties of the octagon.
Polygon Class
To draw a polygon shape p using the graphics library, one uses code like the following:
    p = Polygon(points)
    p.draw(window)
Above, the variable points is a list of Point objects.
Polygon Coordinates
If we want to draw a polygon with $n$-sides, we need to calculate its vertices (the points).
One method is: consider a circle with center (x,y) and radius $r$. Select $n$ points that are evenly spaced on its circumference. Let the $i$-th point be at coordinate $(x_i, y_i)$ where $$x_i = x + r \cos(2 \pi i /n)$$ $$y_i = y + r \sin(2 \pi i / n)$$
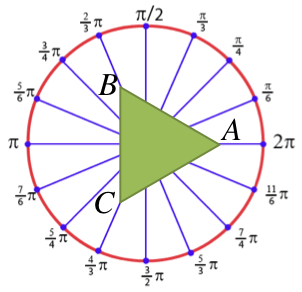
How does this work? Lets consider $n=3$ (thus, $i = 0, 1, 2$). This gives us an equilateral triangle. If we center the triangle at (0,0) and let $r=1$, we could define it using the three points $\left[ \; (x_0, y_0), (x_1, y_1), (x_2, y_2) \; \right]$ as: $$ \left[ \; \left(\cos 0, \sin 0 \right), \left(\cos \frac{2 \pi}{3}, \sin{\frac{2 \pi}{3}} \right), \left(\cos \frac{4 \pi}{3}, \sin{\frac{4 \pi}{3}} \right) \; \right]$$
Visually, this looks like the following, where $\left[ \; (x_0, y_0), (x_1, y_1), (x_2, y_2) \; \right] = \left[A, B, C \right]$:
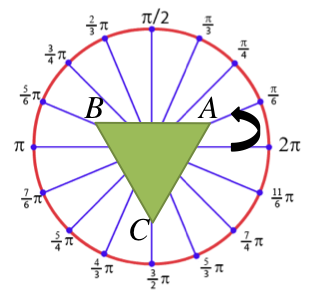
If this polygon is not oriented the way we want it, we can simply rotate it into a new position. Returning to our example, we can rotate our triangle by $\theta = \pi/6$ radians, by using these vertices instead: $$ \left[ \; \left( \cos{ \left( 0+\theta \right)}, \sin{\left(0+\theta\right)} \right), \left( \cos{ \left( \frac{2 \pi}{3}+\theta \right)}, \sin{\left(\frac{2 \pi}{3}+\theta\right)} \right), \left( \cos{ \left( \frac{4 \pi}{3}+\theta \right)}, \sin{\left(\frac{4 \pi}{3}+\theta \right)} \right) \; \right]$$
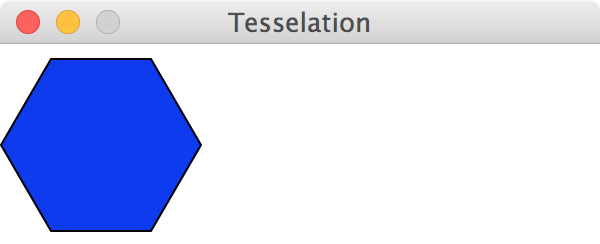
Anatomy of a Hexagon
To draw a hexagon, it is useful to understand its properties.
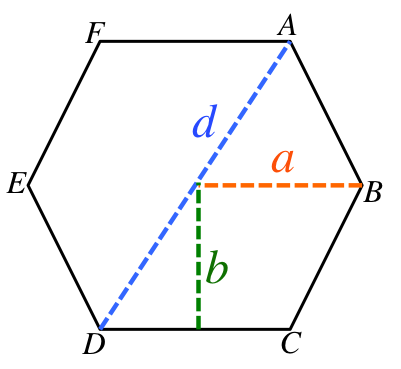
- long diagonal (d)
- Lines AD, FC, EB are all the same length: the distance $d$.
- edge length (a)
- This is the length of every edge (AB, BC, CD, DE, EF, FA). This is the same as the circumcircle radius (the radius of the circle, if we drew a circle on the outside of the hexagon). If we draw this polygon by selecting points on the circumference of a circle, this is the radius of that circle. $$d = 2a$$
- incircle radius (b)
- This is the radius of the circle that fits inside the hexagon (the circle on the inside of the hexagon). $$b = \sqrt{a^2 - \frac{a^2}{4}}$$
Anatomy of an Octagon
To draw an octagon, it is useful to understand its properties.
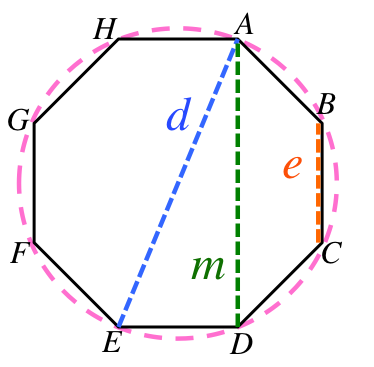
- edge length (e)
- This is the length of every edge (BC, CD, etc).
- long diagonal (d)
- Lines AE, HD, GC, BF are all the same distance: the distance $d$. If we draw this polygon by selecting points on the circumference of a circle, this is the diameter of that circle. $$d = e \sqrt{4 + 2\sqrt{2}}$$
- medium diagonal (m)
- Lines AD, HE, GB, FC are all the same distance: the distance $m$. $$ m = e (1+\sqrt{2}) $$
Checkpoint A
For Checkpoint A, you will need to demonstrate a program that does the following:
- Prompts the user to enter the dimensions for the plane on which the shapes are drawn (see Sample 1, Sample 2). If invalid window inputs are provided, the program should output an error message and exit with an error code (see Sample 3, Sample 4).
- The menu.
Implement and call the
get_selection()function. The program shoud repeatedly call the function, handle the user's selection, possibly draw something, and then loop to show the menu again (see Sample 1, Sample 2).Each time the menu is shown, it should prompt the user for a selection. For checkpoint A, your program only needs to
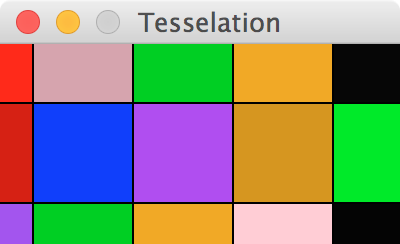
accept numbers 0--13, and the inputs "Q" or "Quit" (any capitalization) as valid user input; however, it will onlyact on a few of these inputs. Later, we will expand both what we accept from the user and how we act on that input. - Square tessellations.
Implement selections 1, 5 and 9 by implementing and calling the
draw_square(),draw_square_line()andtile_squares()functions.In particular,
main()should call the appropriate function according to the user's selection. Yourmain()should prompt the user for relevant parameters in each scenario (see the examples in Sample 5).Read the docstrings of each function to learn what it does. For example,
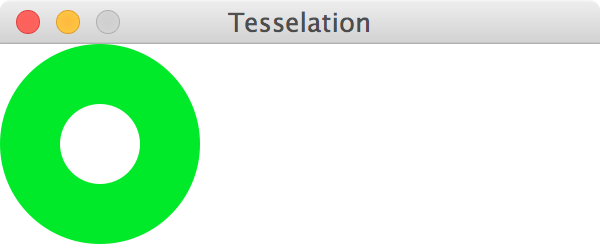
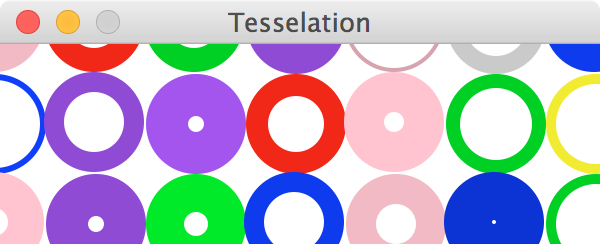
draw_square()draws a single square at a specific place, whiledraw_square_line()usesdraw_squareto draw a line of squares across the entire plane; finally,tile_squaresusesdraw_square_linerepeatedly to tile the entire plane with lines. - Ring tessellations.
Implement selections 2, 6 and 10 by implementing and calling thedraw_ring(),draw_ring_line(), andtile_rings()functions. See Sample 6 to see several examples of the parameters requested for each selection, and the pictures that are drawn. - For checkpoint A: the program does not yet support the remaining selections (3, 4, 7, 8, 11, 12, 13). For these, the program should not draw anything or even create a window. Instead, it should simply loop, showing the user the menu and prompt for the next drawing. (See Sample 2).
- Demo. Demo Checkpoint A.
Advice and Hints
Hint: To determine if a string s is comprised entirely of digits, you can use the string member function s.isdigit(), which will return True if it has only digits in it, and false otherwise.
Hint: To tile the entire plane (the window), you need to know the height and width of the window. Given a GraphWin object called win: one can get its height using the method win.getHeight(), and one can get its width using the method win.getWidth().
Hint: To create a ring with a border, make a circle circ and then use the method circ.setWidth(b) to draw a border of width b.
Be careful: in our graphics library, this method
Hint: To pick a random number between $a$ -- $b$, consider picking a random number between $0$ -- $(b-a)$ and then just add $a$ to it.
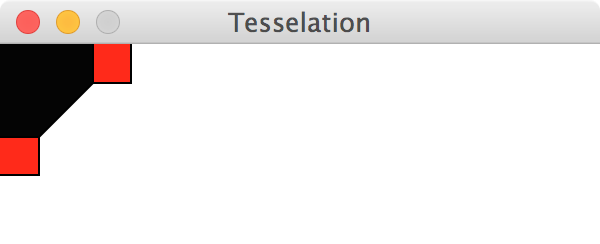
Hint: The functions to tile shapes across the plane each select a random location for the first shape. How to make this random selection in written in the docstring. This hint explains the intention of that specification.
Consider, for example, the function tile_squares(). The possible choices of the first square's upper-left coordinate is somewhere within the solid, green area in the illustration below: it is possible to start the tiling anywhere between (0,0) and (1-w, 1-w).
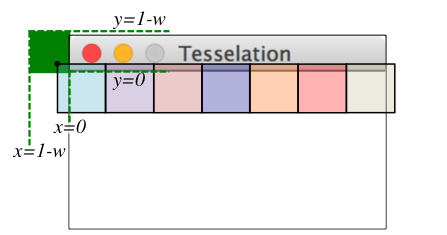
In the case of (0,0), the entire first square would be visible in the window. In the case of (1-w, 1-w), the only visible part of the first square would be the lower-right corner (appearing as a single pixel). Most of the time, something between these two extremes will be selected.
Sample Input/Output
- Sample 1
---> Tessellations Creator <---

 Enter window width: 600
 Enter window height: 600

-----------------------------
--------- Draw Menu ---------
-----------------------------
1. One square
2. One ring
3. One hexagon
4. One octagon
5. Row of squares
6. Row of rings
7. Row of hexagons
8. Row of octagons
9. Tile squares
10. Tile rings
11. Tile hexagons
12. Tile octagons
13. Extra Credit
Type Quit to exit

 Enter selection: QuiT
- Sample 2
---> Tessellations Creator <---

 Enter window width: 500
 Enter window height: 100

-----------------------------
--------- Draw Menu ---------
-----------------------------
1. One square
2. One ring
3. One hexagon
4. One octagon
5. Row of squares
6. Row of rings
7. Row of hexagons
8. Row of octagons
9. Tile squares
10. Tile rings
11. Tile hexagons
12. Tile octagons
13. Extra Credit
Type Quit to exit

 Enter selection: -1
Invalid choice, try again.

-----------------------------
--------- Draw Menu ---------
-----------------------------
1. One square
2. One ring
3. One hexagon
4. One octagon
5. Row of squares
6. Row of rings
7. Row of hexagons
8. Row of octagons
9. Tile squares
10. Tile rings
11. Tile hexagons
12. Tile octagons
13. Extra Credit
Type Quit to exit

 Enter selection: q
- Sample 3
---> Tessellations Creator <---

 Enter window width: 0
ERROR: width must be > 0
- Sample 4
---> Tessellations Creator <---

 Enter window width: 600
 Enter window height: 0
ERROR: height must be > 0
- Sample 5
- The below has only partial input/output shown, for brevity. The examples employ a drawing window of size (200, 100).
 Enter selection: 1
 Enter x-value of upper-left square: 10
 Enter y-value of upper-left square: 10
 Enter side length: 90
 Enter selection: 5
 Enter x-value of upper-left square: 50
 Enter y-value of upper-left square: 50
 Enter side length: 30
 Enter selection: 9
 Enter side length: 100
 Enter selection: 9
 Enter side length: 50
- Sample 6
- The below has only partial input/output shown, for brevity. The examples employ a drawing window of size (300, 100).
 Enter selection: 2
 Enter x-value of center: 50
 Enter y-value of center: 50
 Enter radius: 50
 Enter ring width: 60
Error: ring width should not be larger than ring radius.
Nothing is drawn and no window is created.Enter selection: 2 Enter x-value of center: 0 Enter y-value of center: 0 Enter radius: 100 Enter ring width: 50

 Enter selection: 2
 Enter x-value of center: 50
 Enter y-value of center: 50
 Enter radius: 50
 Enter ring width: 30
 Enter selection: 6
 Enter x-value of center: 150
 Enter y-value of center: 50
 Enter radius: 30
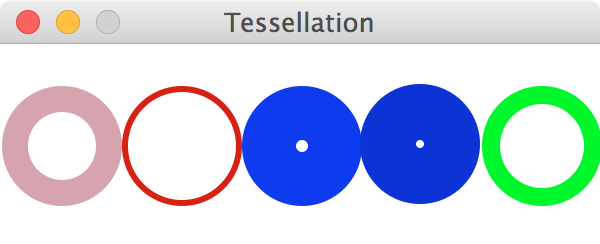
 Enter selection: 10
 Enter radius: 25
Checkpoint B
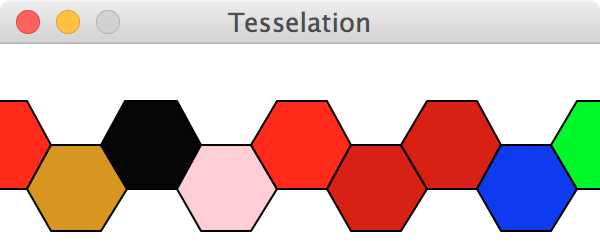
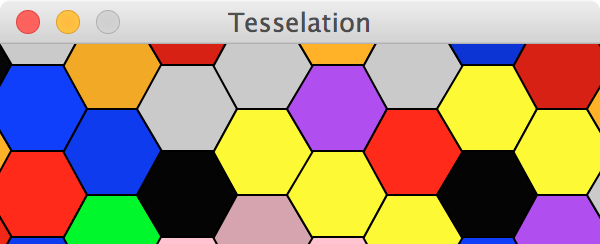
For Checkpoint B, you will extend your code from Checkpoint A by supporting two new tilings: hexagons and octagons.
- Hexagon tessellations.
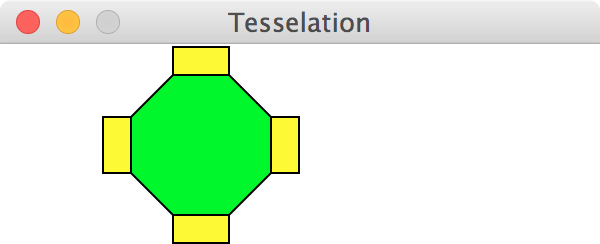
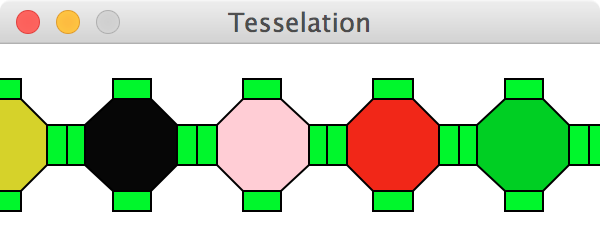
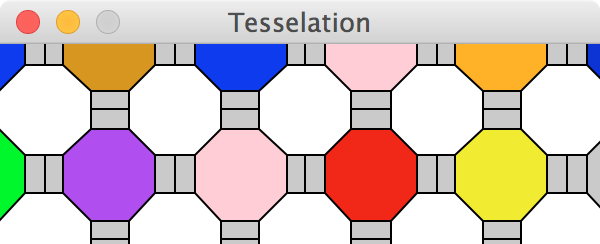
Implement selections 3, 7 and 11 by implementing and calling thedraw_hexagon(),draw_hexagon_line(), andtile_hexagons()functions. See Sample 7 to see several examples of the parameters requested for each selection, and the pictures that are drawn. - Octagon tessellations.
Implement selections 4, 8 and 12 by implementing and calling thedraw_octagon(),draw_octagon_line(), andtile_octagons()functions. See Sample 8 to see several examples of the parameters requested for each selection, and the pictures that are drawn. - Demo. Demo Checkpoint B.
Advice and Hints
Hint: The graphics package requires integers when creating Points in the graphics window. Be aware you may need to think of well-reasoned or relatively safe ways to turn a float back into an int, in order to draw things. Try to figure out the best way to do this, but it is ok if your drawings overlap or are "off" by a pixel or two, due to rounding; some of the samples given below are "off" by a pixel, for example.
Sample Input/Output
- Sample 7
- The below has only partial input/output shown, for brevity. The examples employ a drawing window of size (300, 100).
 Enter selection: 3
 Enter x-value of center: 0
 Enter y-value of center: 0
 Enter long diagonal: 100
 Enter selection: 3
 Enter x-value of center: 50
 Enter y-value of center: 50
 Enter long diagonal: 100
 Enter selection: 7
 Enter x-value of center: 0
 Enter y-value of center: 50
 Enter long diagonal: 50
 Enter selection: 11
 Enter long diagonal: 50
- Sample 8
- The below has only partial input/output shown, for brevity. The examples employ a drawing window of size (300, 100).
 Enter selection: 4
 Enter x-value of center: 0
 Enter y-value of center: 0
 Enter long diagonal: 100
 Enter selection: 4
 Enter x-value of center: 100
 Enter y-value of center: 50
 Enter long diagonal: 75
 Enter selection: 8
 Enter x-value of center: 0
 Enter y-value of center: 50
 Enter long diagonal: 50
 Enter selection: 12
 Enter long diagonal: 50
Final Code
For your final code, extend get_selection() to let the user input strings, rather than just using numbers to indicate a selection. Specifically, the following words should be supported: "square", "ring", "hexagon" "octagon", "row" and "tile". How to support these words is explained below:
- All input should be case-insensitive (i.e., user may enter any capitlaization they choose).
- The user will input either one or two words, and this should be mapped into the correct numeric selection. For example, "square" would map into selection 1; the input "row square" or "square row" would both map into selection 5; the input "tile square" or "square tile" would both map into selection 9.
- Any invalid combination of words should be considered a 'soft error': output an errror message, but do not halt the program. Instead, simply prompt the user with the menu again. Examples of soft error conditions include: "square ring", "octagon octagon", "pizza rat", etc.
There is no demo for your final code.
Extra Credit
You can get extra credit by creating your own tessellations. To earn +6 pts, your work must satisfy the following criteria:
- The extra credit should be mentioned in your program's docstring.
- It should be demonstrated when the user selects 13 from the menu.
- The demonstration should show a valid wallpaper tessellations that completely fills the plane.
- Its implementation should be divided into separate functions, each of which are documeted accurately (following the docstring style demonstrated in the template).
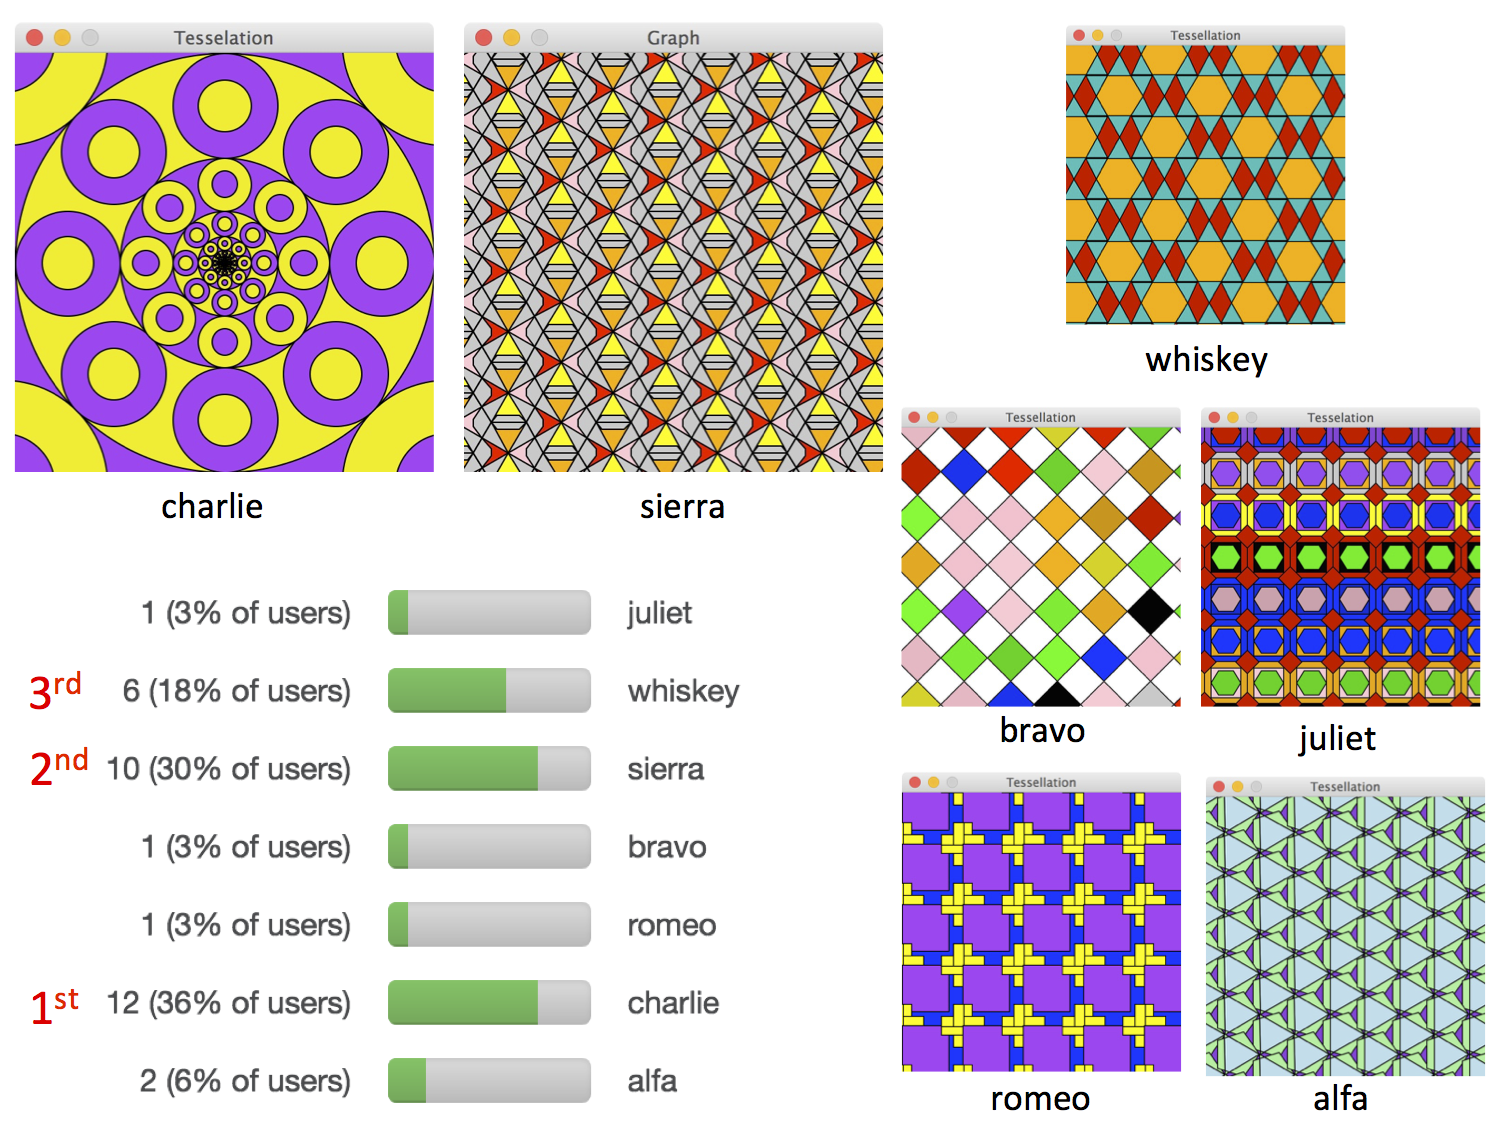
Any extra credit submitted will also be enrolled in an online art contest, where the class votes on their favorite digital artwork. Voting and submissions will be anonymous. If any student votes for your artwork, you get +1pt exta credit. If over 1/3 of the voters select your artwork, you will get an additional +3pt extra credit.
You may create an entirely unique tessellation, or find a tiling from art and copy that tessellation. The below might inspire you:
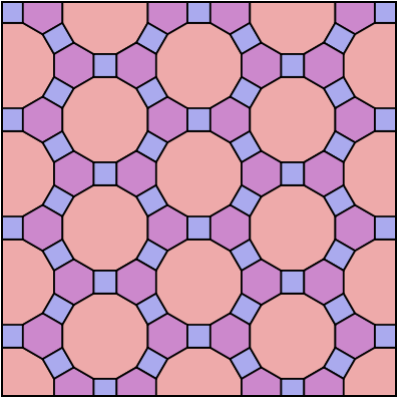
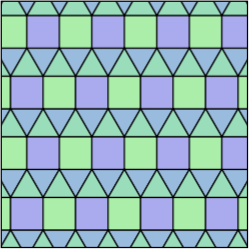
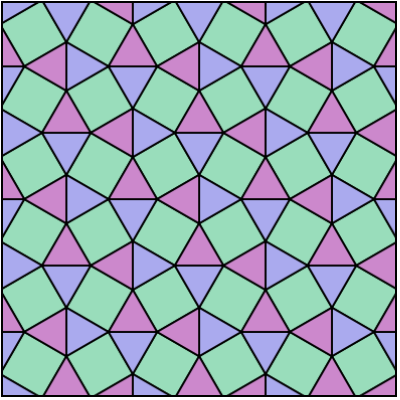
Grading Rubric
- Checkpoints [20%]
-
Checkpoint demos are each worth 10 points; each is all or nothing.
- Programming Design and Style [25%]
-
In addition to being correct, your program should be easy to understand and well documented. For details, see the rubric below.
- Correctness [55%]
-
The most important part of your grade is the correctness of your final program. Your program will be tested numerous times, using different inputs, to be sure that it meets the specification. You will not get full credit for this unless your output matches the sample output exactly for every case, including capitalization and spacing. Attention to detail will pay off on this assignment. For details, see the rubric below.
Detailed Rubric
Correctness: functional features (50 points -- 5 points each)
| Case 1: | The main menu appears exactly as shown in the sample (see Sample 1). |
| Case 2: | When the user inputs an invalid number for width or height of the window, the program produces an exit code (Ex: Samples 3 and 4). |
| Case 3: | When the user inputs a value indicating the program should quit, or an invalid selection or a valid selection the program behaves as described (Ex: Samples 1 and 2). |
| Case 4: |
The functions draw_square(), draw_square_line() and tile_squares() are implemented as described, and call each other when appropriate.
|
| Case 5: |
The functions draw_ring(), draw_ring_line() and tile_rings() are implemented as described, and call each other when appropriate.
|
| Case 6: | When a user selects an invalid ring border, an approprate message is displayed. When a user selects a valid ring border, the circle radius is accurately drawn (see the hint in Checkpoint A). |
| Case 7: |
The functions draw_hexagon(), draw_hexagon_line() and tile_hexagons() are implemented as described, and call each other when appropriate.
|
| Case 8: |
The functions draw_octagon(), draw_octagon_line() and tile_octagon() are implemented as described, and call each other when appropriate.
|
| Case 9: | The tiling and line options (selection 5--12) work correctly for any window dimensions. There are no gaps or missing elements in any rows or columns when tiling. No shapes are drawn twice, or overlap in a way that deteriorates the symmetry of the tiling. |
| Case 10: | When nothing is being drawn by the program, no window is displayed. A window is only displayed after all input has been validated and right before a function is called that will actually draw something. |
Correctness: spacing, spelling, grammar, punctuation (5 points)
Your spelling, punctuation, etc. get a separate score: each minor error in spacing, punctuation, or spelling gets a score of 2.5, and each major error gets a score of 5. Here is how the score translates to points on the assignment:
| [5] | Score = 0 |
| -1 | 0 < Score <= 2.5 |
| -2 | 2.5 < Score <= 5 |
| -3 | 5 < Score <= 7.5 |
| -4 | 7.5 < Score <= 10 |
| -5 | Score > 10 |
Programming Design and Style (25 points)
- Docstring (5 points)
- There should be a docstring at the top of your submitted file with the following information:
1 pt. Your name (first and last) 1 pt. The course (CS 115) 1 pt. The assignment (e.g., Project 1) 2 pts. A brief description of what the program does - Documentation (6 points)
- Not counting the docstring, your program should contain at least three comments explaining aspects of your code that are potentially tricky for a person reading it to understand. You should assume that the person understands what Python syntax means but may not understand why you are doing what you are doing.
6 pts. You have at least 3 useful comments (2 points each) - Variables (5 points)
-
5 pts. Variables have helpful names that indicate what kind of information they contain. - Algorithm (4 points)
-
2 pts. Your algorithm is straightforward and easy to follow. 2 pts. Your algorithm is reasonably efficient, with no wasted computation or unused variables. - Program structure (5 points)
- All or nothing: your code should define a main function and then call that function, just like our programs do in the lab. Other than library imports, the docstring, and the final call to
main(), you should not have any stray code outside a function definition. - Catchall
- For students using language features that were not covered in class, up to 5 points may be taken off if the principles of programming style are not adhered to when using these features. If you have any questions about what this means, then ask.
Submission
You should submit your final code on Moodle by the deadline. I strongly encourage you to take precautions to make and manage backups while you work on your project, in case something goes wrong either while working or with your submission to Moodle.
Name the file you submit to Moodle yourlastnameP2.py, substituting your actual last name (in lowercase) for yourlastname.
Late Policies
Project late policies are outlined in the course policies page.
Collaboration Policy
Programming projects must be your own work, and academic misconduct is taken very seriously. You may discuss ideas and approaches with other students and the course staff, but you should work out all details and write up all solutions on your own. The following actions will be penalized as academic dishonesty:
- Copying part or all of another student's assignment
- Copying old or published solutions
- Looking at another student's code or discussing it in great detail. You will be penalized if your program matches another student's program too closely.
- Showing your code or describing your code in great detail to anyone other than the course staff or tutor.
References
This assignment is based on the CS1 "Tessellation" assignment by Robert Muller (Boston College), published via NCWIT's EngageCSEdu project.