CS 115 Project 3: Image Transformations
Summary: In this project, you will help the user do some basic image transformations.
Due dates:
- Checkpoint A: Due Tue, Nov. 24 at 4PM
- Final code: Due Tue, Dec 08 at 11:55PM
Setting up your files
Because of the graphics libraries this project uses, you will need to do
the project on your own computer or in the labs. You will need the
following files to be in the same directory as your code:
- The graphics.py library.
Do not modify this file.
- Any sample .gif file you want to work with. The examples
in this specification use seawolves.gif. For faster processing times, you may also try using the smaller image file seawolves_small.gif
Full Specification
Before you start coding, you should read the Image
documentation and contents of the Image class
provided in graphics.py. Read the description of these functions very, very carefully
and ask questions early -- understanding what these
methods do will save you a lot of time.
The Input File
- Prompt the user for the name of a .gif image file.
- Immediately after the user provides the input file name, you should attempt to
create an Image object using the given filename.
- Your program should print an error message and exit the program if the file could not be opened
OR if it is not a valid image.
- If the file could not be opened or is empty, the resulting image object will have
a width and height of 0.
- If the file could be opened, but is not a valid image, the Image
class will raise a tk.TclError exception.
- If the file is a valid image, open and display the image in a graphical window, with Title "Click to continue..". For this purpose:
- Create a GraphWin object instance of the same size as that of image.
- Use the draw member function of Image class to draw the image. You will also need to update the anchor point of the image to be at the center of the graphical window.
Processing Steps
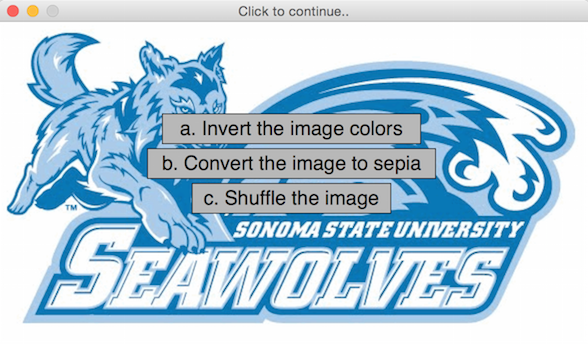
- Upon a single mouse click, display the menu below on top of the image:
- You may use the function draw_button in drift_graphics.py from project 02 to make a button. You will need to modify this function to return the Rectangle object corresponding to the button, so that you could use it in the next step.
- Based on where the user clicks, determine the choice user selected.
- You may use and modify the function wait_for_button in drift_graphics.py. The difference would be that it would take a list of buttons as a parameter instead of a single button (as was the case in project 02) and then return an id corresponding to the button that the user clicked.
-
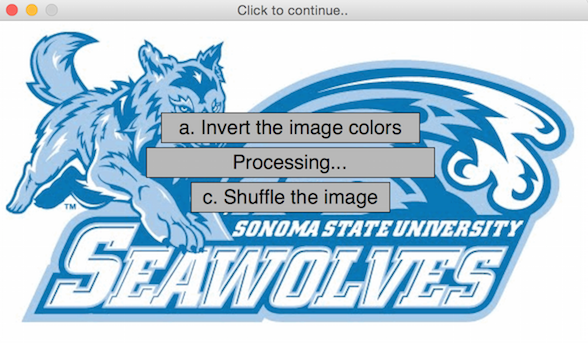
As per user's choice, perform the corresponding transformation (see "The Transformation" section below). While the transformation is taking place, change the text of the button to "Processing...".
- To change the button text, you will need the function draw_button to also return button texts.
- When the transformation is complete, show the transformed image in the same graphical window (see example of transformed images below) and close the window on one mouse click.
The Output File
- Now, prompt the user for a filename for the modified image.
- Immediately after the user provides the output filename, you should attempt to
save the image to the given file.
- Your program should print an error message and exit the program if the file
could not be saved. If the file could not be saved, the Image class will raise a tk.TclError exception.
- Your program only needs to do one transformation per run. Your program should end after you have
completed the user's transformation and saved the image.
The Transformations
You should modify the image in accordance with the user's menu choice. This section describes
the 3 transformations you should implement.
Note: The image library is pretty slow. Each of these functions may take
some time to run.
All of the examples shown start with the sample image below:

Option A: Inverted Colors
For this transformation, you should loop over all of the pixels of the input
Image. For each pixel, you should set the red, green, and blue values
equal to their old values subtracted from 255. Use setPixel to save the modified pixel into the Image object.
Example output:

Option B: Sepia
Modify the fields of each pixel according to the following formulas. Note that these formulas
are not written directly in Python code!
new red = (old red * .393) + (old green * .769) + (old blue * .189)
new green = (old red * .349) + (old green * .686) + (old blue * .168)
new blue = (old red * .272) + (old green * .534) + (old blue * .131)
If any of the new values exceeds 255, set it equal to 255.
You will need to convert these values to integers before attempting to create the pixel.
Sample output:

Option C: Shuffle
Split the image up into at least 4 pieces of equal size (or as close to equal as the image dimensions allow).
Rearrange these pieces so that no piece remains in its original location. At least one piece should move
horizontally, and at least one piece should move vertically.
Here is an example:

Checkpoint
For the checkpoint, you should be able to demonstrate all of the functionality from the
"The Input File" and "Processing Steps" sections of the specification.
You do not need to actually implement any of the transformations yet -- you can just instead pause the program for 3 seconds to simulate the amount of time for the transformation to take place. For this purpose, import the time library and use time.sleep(3).
Extra Credit (up to 10 points)
For extra credit, you can support additional transformations and add these in the main menu itself.
Example transformations could be to smooth the image or getting edges in the image.
If you need help brainstorming additional transformations, feel free to ask!
Grading
The grading and style guidelines from Project 2 apply to this project as well. The full grading rubric is posted at cs115_p3_rubric_full.html
Correctness [60%]
60% of your grade will be on the correctness of your program. You will not get full credit for this 60%
unless your output contains the required information.
Programming Design and Style [30%]
Another 30% will be on your programming design and style. “Programming design” means that your code shows a
logical, straightforward breakdown of the problem. “Programming style” means that you obeyed certain rules
to make your program easier for yourself and others to read.
Note that you are REQUIRED to divide your code for this project into functions.
You do not have to design your own classes.
Checkpoints [10%]
The final 10% of your grade will be the checkpoint. The checkpoint cannot be submitted late.
Submitting your final code on Moodle
You should submit your final code on Moodle by the deadline. As a backup, I strongly encourage you to upload a copy to your cwolf directory in case something goes wrong with your submission to Moodle.
Please name your file yourlastnameP3.py, substituting your actual last name (in lowercase) as indicated.
You only need to submit your own Python file. I will use my own copy of the graphics library and my own test images.
Collaboration policy
Programming projects must be your own work, and academic misconduct is taken very seriously.
You may discuss ideas and approaches with other students and the course staff, but you should work out all details and write up all solutions on your own. The following actions will be penalized as academic dishonesty:
- Copying part or all of another student's assignment
- Copying old or published solutions
- Looking at another student's code or discussing it in great detail. You will be penalized if your program matches another student's program too closely.
- Showing your code or describing your code in great detail to anyone other than the course staff or tutors.
Late policy
There is a 48-hour grace period associated with the final project deadline.
This grace period is designed to cover small personal emergencies and other unexpected events.
No other consideration will be given for these small emergencies.